Tuesday, October 16, 2012

James Taylor, Mint Green, and Butternut Squash Mac and Cheese

Thriving in Squash Season

Oh the goodies, so many kinds!

This week was the official last week of my fabulous CSA, Western Montana Growers Co-op. We are deeply saddened harvest is over and for my last request, I ordered several squashes to store in my pantry. We received spaghetti, Hubbard, red kuri, pumpkin and many butternut squash because it is my ALL TIME FAVORITE!

This week we'll be making, and time permitting blogging, two different butternut dishes, and tonight with the rain and the wind, there were three things I needed to get through the evening with three little boys, James Taylor, mint green tea, and butternut squash mac and cheese.

Butternut Squash Mac and Cheese

INGREDIENTS: * means its local

2 tbl butter *
2 tbl minced shallot *
1/2 large butternut squash, cubed into 1 inch pieces *
1/2 cup white wine (if you don't keep wine, just substitute for more chicken stock)
3/4 cup chicken stock * (homemade is best but canned will do)
1 cup whole milk *
1 cup (plus 1/2 cup for later) shredded sharp cheddar cheese *
1 cup  (plus another 1/2 cup for later) mozzarella cheese *
1/4 cup grated Parmesan
3/4 cup seasoned breadcrumbs
2 cups dry pasta, your choice, cooked until tender 
1/2 tsp nutmeg
1 tsp salt
1 tsp black pepper

Put a large pot of water on to boil and begin cooking your pasta according to package direction until tender. 

In a large sauce pan melt your butter and saute your shallots for about 5 minutes until translucent and fabulous smelling. Add your cubed squash and saute in the butter and shallots for another 5 minutes. 

At this time, add your wine and broth and simmer, covered, until your squash is very tender, to the point of mashing with a fork, about 15 minutes. When tender, add your milk and then blend until smooth with an immersion blender or in a food processor.

Turn your oven on to 325 degrees.

Return sauce to low heat and slowly add and stir your first cup of cheddar and mozzarella until they melt into the sauce. Add your salt, pepper and nutmeg and maintain on a low heat, stirring occasionally.

When your pasta is finished cooking, drain and add the pasta into a medium sized, oven safe casserole dish. Pour your fabulous sauce into the pasta and mix it about. Sprinkle breadcrumbs, Parmesan cheese and the remaining shredded cheese to the top and bake at 325 until the sides are bubbling and the crumbs appear a bit brown, about 20 minutes. Keep an eye on it as if it has stopped bubbling, it is starting to go from gooey to pastey.

Enjoy!


Tuesday, October 9, 2012

Delicious and Nourishing (Not Lunch Lady) Salisbury Steak

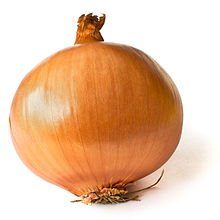
I had this salt and onion carving, and made it come true!

   
Why do you taste so good with salt and meat?!

I usually hate the idea of school lunch and my first grader brings a home packed cold lunch almost every day of the week. Occasionally, he will indulge in corn dog day, his favorite of all hot lunch days. Confession, my favorite was Salisbury steak and mashed potato day, and I was craving it in a crazy way.

I therefor declared I would find a way to make it in a not gross way, and tonight, I mastered that, and then some!

INGREDIENTS!

1 pound 85/15 ground beef
1 dinner roll, crumbled onto a cookie sheet and turned into bread crumbs
1/2 cup minced onions
1/2 teaspoon salt
1/2 teaspoon black pepper
1 pastured egg
1 tbl Worcestershire sauce 

Flour for dusting
2 tbl butter

parchment paper
1 large cast iron skillet

Turn your oven on to 350 degrees. Take a dinner roll or two slices of artisan bread and crumble it onto a cookie sheet. Bake in your oven for around 5 minutes, not burning the crumbs but drying them out.

In a large mixing bowl, add your beef, egg, onions, salt, pepper and Worcestershire. Pull your bread crumbs from the oven and allow them to cool. Add the crumbs to the bowl and with your hands mix thoroughly. 

Put a sheet of parchment paper on a plate. Separate your beef mix into eight equal sized balls. On the first layer of parchment, place four balls and flatten them to less than 1/2 inch thick, closer to 1/4 inch. Dust with flour, then lay down a piece of parchment paper on top. Take the next four balls, flatten them into 1/4 to 1/2 inch patties and then dust with flour.

Allow the patties to sit and mellow at room temperature for about 30 minutes.

Heat your cast iron skillet to medium high heat and melt your butter. Add four patties, flour side down, and sprinkle the tops with a bit more flour.

Cook until the edges start to look more brown than pink, about 5 minutes, then flip. Cook for another five. Remove and allow to rest on a plate while you cook the next batch.

We ate ours alongside mashed potatoes and butter poached carrots. Soooooo yummy!


Sunday, October 7, 2012

Ham and Pea Soup and Quick Yeast Rolls

My crock pot is so special to me, I honestly should name it...

Seriously, I adore my little crock pot and have used it so much lately, I free it will soon break. 

Its perfect for nights you know you'll be rushed, days you need to smell something good when you walk in the door, and avoiding the "oh crap soccer's over at 6:30 and I can't make anything for my hungry kids in the 30 minute window we have before bath time" phenomena.

Last night was Saturday night, when as a family we make the trek to mass. Our church is honestly only six blocks from our house but with a 6, 4, and 2 year old its a trek nonetheless. An an exercise in patience for my husband and I who try to keep our trio of not so tidy gentlemen managed in a neat enough way so as not to get "the eye" from the old ladies surrounding us.

By the time we get home, everyone is hungry, and goofy. I cannot cook and wrangle after an hour of patience exercising. This is when I whip out the crock pot. Last night we had ham and pea soup made with homemade chicken stock and leftovers of our Easter ham (it was frozen, I promise no one ate mold.)

Here is how I managed to serve an all day dinner as soon as we came home:

Ham and Pea Soup in the Crock Pot

Mmmmmmmm. Peas.

A few disclaimers here. Part of getting the savory flavor of a well loved meal is prepping ahead. There were a few parts that needed done ahead of time. 

One is if you use dried split peas, as I did, you HAVE TO SOAK THEM in twice as much water as peas for 24 hours ahead of time or they will never cook right. 

Two is for the best tasting soup, using homemade chicken stock is a must, but you can used canned if you don't make stock. I make stock out of every chicken carcass we roast, one or two times a month, and then freeze it for later. Alice Waters chicken stock recipe is my favorite.

Ingredients:

6 cups chicken stock (home made or store bought)
2 cups dried split peas (make sure to soak them for 24 hours at least in 4 cups water, then drain off the water before adding)
2 cups cooked ham (I froze extras from Easter and then reused it last night, ham freezes amazingly well)
1 cup chopped celery
1 small yellow or white onion, chopped
3-4 chopped carrots
1 cup chopped green cabbage
1 bay leaf
Salt and Pepper to your taste

Here's how it goes:

STEP 1: Walk into the kitchen in your bathrobe, make coffee, drink coffee, check Facebook on your ipod touch. OK, you don't have to do this part, this is how I started off though.

REAL STEP 1: Get out your crock pot. Ours is not huge, actually pretty small. Chop, then add in your veggies, peas, bay leaf, ham, spice, and last put in your stock.

STEP 2: Set crock pot to  high for the first 4 hours, low for the next 4-6 hours. Give it a good stir when you remember, once or twice out to do it to mix things up a bit. 

To go with, I premade (baked in the afternoon then sealed in a container) some yummilicious rolls. Here is the recipe for those, they were a fabulous addition to our soup meal! Quick Yeast Rolls from All Recipes


Sunday, September 23, 2012

You MUSY Try this: Crock Pot Apple Butter

This Season's Discovery: Crock Pot Apple Butter

It Montana apple season, and they're coming in droves!
I have fond memories from being 7 or 8 years old and going to an apple orchard. It must have been in Nebraska, where we were living at the time, and I remember cider, hay rides, and all around fall fun. Maybe that's why when we had the chance to buy a house with three mature apple trees, we jumped on it.

Apple can seem so blah when all you eat or buy are the red apples from Wal-Mart and they are the same, bland fruit over and over. We are so fortunate in Montana to have great apple weather and tons of varietals of apple. This week in our CSA box we received several bags of beautiful pinkish apples, sweet but crisp. We've eaten plenty raw, but with the extras today I am making the easiest and most delicious and easily storable item, APPLE BUTTER!

My grandmother's made this beautiful concoction, but this year is the first I have ever tried it. It amazingly simple, totally cannable, freezable, and store in the fridgeable, and I have some in my crock pot right now! We eat it on bread, in yogurt, on pancakes, or by the spoonful for a treat. Try it, its easy.

You'll need:

A crock pot (our is medium sized, not large and it works fine)
A sharp knife
A vegetable peeler
1 Cup Sweetener (sugar, honey, Steevia, what have you)
2 Tablespoons Cinnamon
2 Tablespoons Apple Cider Vinegar
Apples (any variety, about a dozen medium sized for us)

Here's How:

Peel your apples and cut them into quarters. Don't use the core. 

Put them all in the crock pot while it is still off. 

Add your sweetener, vinegar, and cinnamon. 

Put the lid on and turn your crock pot on high for the first hour. 

Turn it back to low and allow it to go ALL DAY, eight hours or more. 

For the last hour take the lid off, turn it to high and let it bubble with the lid off. Occasionally give the contents a stir throughout the day but no need to babysit it. 

When finished, it is molten hot. Your can store it in canning jars in the fridge, but allow it to cool overnight before you put the lid on and put it in the fridge. You can also can it, but I have not attempted this yet. 


Tuesday, September 18, 2012

Bulbous Purple Nightshade Tale

Eggplant Parmesan ala Busy Mom

Many varieties, many uses :)
This week in our CSA box, we snagged two purple beauties, and the first thing that came to my mind with eggplants was Parmesan!I was hoping it would be more fall like this week but today was more smokey than anything. I still wanted this cheesy goodness so baked it even thought the weather wasn't perfect for it.

Eggplants, when cooked wrong, are chewy and can turn you off of dinner quickly. I perused the internet and found a few ideas to create the following dish delish! I used my own canned tomato sauce for this recipe, but I'm sure you can use store bought just as well. The home canned sauce was amazing though, and organic and cheap because I made it!

And it wasn't all that hard!

Preheat your oven to 375 degrees.

Ingredients: * means its local

2 medium eggplants *
3 eggs *
1 sleeve saltine crackers
1/2 cup flour *
1 tsp garlic salt
1 tsp dried oregano *
1 tablespoon salt

3 tbl olive oil

2 pints spaghetti sauce *
3 cups shredded cheese (we used Parmesan, cheddar, and Monterrey jack) *

Slice your eggplants into 1/2 inch rounds, put them in a colander and rub with salt, allow them to sit for an hour if you have the time, 30 minutes if you need less.

In a small bowl, whip your eggs with a fork until thoroughly combined. In another medium bowl, crush your crackers and mix them with the flour, garlic salt, and oregano.

Blot your eggplants on paper towels. Heat a pan to medium high heat with your oil in it until the oil shimmers. Batter your eggplant pieces in egg first, then flour mixture, then egg again, then flour mixture again. Saute them in the oil for 6-8 minutes a side, until golden brown but also allowing the middle to soften and the batter to crisp.

Fry your eggplants in batches until done and set them aside.

In a baking dish (I used an 8X8) pour a pint of sauce on the bottom. Then add a layer of fried eggplants and then 1/2 of your cheese mixture. Add another layer of eggplant, another pint of spghetti sauce and the rest of your cheese.

Bake at 375 for 35-40 minutes or so, and when you remove them, let them sit for ten minutes before serving. They were crunchy, cheesy, saucy and awesome!


Monday, September 10, 2012

Like a Nerd on Date Night, Fumbling through Chile Rellenos

Peppers, Peppers, Peppers, Cheese and Spice!

Hellooooo handsome!
This week our delightful CSA sent us bell and poblano peppers, the likes of which were shiny, firm, beautiful and fabulous. I held them in my hands and thought about the delicious possibilities. Peppers contain high amounts of vitamins C and A, and when I have the chance to make a filling dish based on veg and not meat, I will take it! From these thoughts, I started to fumble through chile rellenos, a Mexican version of stuffed peppers, and here's what I ended up with:

Ingredients: * Mean its local

6 peppers (any kind, I used poblano and bell) *
2 tablespoons olive oil
1 cup bread crumbs (panko have a good crunch but any are fine)
1 cup shredded cheese (we used raw milk cheddar, half for the filling, half for the topping) *
3/4 cup fresh cilantro, torn or chopped *
1/2 teaspoon cumin
1/2 teaspoon pepper
2 diced garlic cloves *
1 cup milk *
4 eggs *
1/2 cup flour *
1/2 teaspoon salt
1 teaspoon baking powder
1 slicing tomato *


STEP 1:

You'll need 6 peppers of your choice, I used 3 poblano and 3 bell because I was not sure how spicy the spicy peppers would be in the end (mild heat, by the way.)

Rub the peppers in olive oil and put them on a baking sheet under your oven broiler. Turn it to high and let them roast and blacken their skins for about 4 minutes before turning them with tongs to blacken the next side.

After each side is pretty black and charred, but not smoking or on fire, take them off your baking sheet, put them in a lidded rubbermaid container or ziploc bag, and seal them in for a good ten minutes while they cook down and the skins loosen up.

After ten minutes run some cold water from the tap, rinse off the peppers and peel off the skin. Set your peppers aside.

STEP 2:

Prepare your stuffing! I used 1 cup of bread crumbs, 1/2 cup shredded raw cheddar cheese, tear up about 1/4 cup of cilantro and mix it in with 1/2 teaspoon cumin and 1/2 teaspoon pepper. Add in 2 diced garlic cloves and stir it all together.

STEP 3:

Ready your batter! In a food processor, with a stick blender, or even with just a fork, mix together 1 cup milk, 4 eggs, 1/2 cup flour, 1 teaspoon baking powder and a pinch of salt.

Step 4:

Stuff your peppers! Set aside your choice of cheese in six large chunks, cheddar, Monterrey jack, your choice, for ease I used mozzarella (its what I had!) Oil a baking dish and set your peppers inside of it. Put a generous spoonful of stuffing and piece of cheese inside each pepper (they will fall apart a bit, no one will care!) One they are all stuffed, pour the batter on top of them, slice up a tomato and layer it on top of the batter, tear up about 1/2 cup of cilantro and drop it on top of the tomatoes and sprinkle more cheese, your choice on top of that.

STEP 5: Bake! For 35 minutes at 350 degrees.

We ate our covered in salsa and sour cream and they were awesome!


Monday, September 3, 2012

Gringa Green Tomatillo Enchiladas

Trying Something New with Montaxican

I tried these for the first time yesterday, and it was delightful!
Continuing my exploration into new things, this week I received a bag of tomatillos from our CSA. These little green guys look like baby tomatoes but are in fact relatives of the gooseberry. I scoured the internet for ideas, my cookbooks not offering much inspiration. After combing a few sights I decided to experiment in roasting my own green enchilada sauce using these instead of green chiles.

I took inspiration from the tomato sauce I make and for the first time ever, canned last week. I used the lovely green sauce in some enchiladas that I put in our oven on a timer so we could go to Saturday night mass and come home to a fully cooked, delicious meal.

Here's what I tried out:

Gringa Green Enchiladas

Ingredients: * means its local

1 pound tomatillos *
1/2 walla walla onion *
1 jalepeno pepper *
1 bulb garlic *
2 chicken bullion cubes
2 teaspoons cumin
1 teaspoon coriander
1 teaspoon black pepper
 1 tablespoon olive oil

8 eight inch corn tortillas *
1 pound pork sausage *
1/2 cup cooked corn kernals *

2 cups shredded cheddar cheese *
1 slicing tomato *

In an oven safe dish, put your skinned tomatillos, chopped onion, diced pepper, crushed garlic, bullion cubes, cumin, coriander, black pepper and olive oil. Mix it with your hands and then put it in the oven at 425 degrees for about 30 minutes while it roasts and mixes its flavors.

While your sauce roasts, cook your ground pork sausage in a large skillet until done, and then add the corn when it is almost finished.

When your tomatillos are done roasting, remove from the oven, allow it to sit until its done bubbling and then pop in in your food processor or blender and pulse until creamy and smooth.

In another oven safe dish, fill your tortillas with your pork mixture and a bit of cheese. Roll the tortillas shut and place them seam side down. Fill all your tortillas and when done, cover with your gringa green sauce, then slices of your tomato, then your shredded cheese.

Bake uncovered for 35 minutes at 375 degrees. Allow to cook a few minutes, and then enjoy!