Saturday, December 8, 2012

Shallots and Cream Lead to a Deeply Satisfying Night

White Outs, Church Night, and Another Use for Taters

Does anyone else think that snow means ham and cheese?
This morning I trudged through a Montana white out (please Lord let this not be a field and still the road style) to bring my 7 year old to a birthday party. After white knuckling through the white out home, I couldn't stop thinking about melted cheese. Oh, and ham, sweet, sweet ham. 

Tonight was one of the those evenings where I found myself proclaiming very loudly to my very comfortable husband that we would be going to church. After a few weeks off due to 1000 different reasons, we were overdue. At 4:00 I realized I needed to get dinner planned out or when we burst into the house at 6:00 after services, our crazy bunch would be in tears and their mother in shambles trying to feed them quickly. I had time, but not much of it.

I bought a smoked ham (small, about 2 pounds) the day before and quickly glazed it in a mixture of equal parts Dijon mustard, maple syrup,and brown sugar with a dash of pepper thrown in for good measure. I put it in a container, threw a lid on it, and set it aside. 

Then, it was tater time. My parents sent us home with three sacks of potatoes last visit and we've made it through a 2 already. We've french fried, baked, and mashed plenty, but tonight I was feeling brave, so attempted, and succeeded in scalloped potatoes. I did not have to make the elaborate cheese sauce, I sliced, diced and threw together something quaint and delicious.

I had to gamble on the same baking time and temperature my ham needed as they would be in the oven while we were away at mass, and somehow the fates smiled upon us. Here is how I made them, and baked them at the same time as the ham and everything was done when we walked in the door.

SIMPLE SCALLOPED SPUDS WITH SHALLOTS AND CREAM

Ingredients:
1 tbl butter
5 yukon gold potatoes
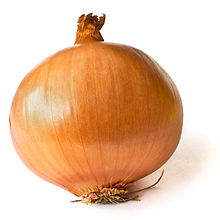
3 tbl diced shallots
3/4 pint of cream
1 1/2 cups sharp cheddar cheese
1 1/2 tsp salt 
1 1/2 tsp pepper

Preheat your oven to 350 degrees. Slice your potatoes into thin slices, about 1 cm each. Mince your shallots and set aside. 

In an 8X8 baking dish melt 1 tablespoon of butter and swirl it around until the bottom is coated. Place a layer of potatoes, trying only to overlap when necessary. Sprinkle the potatoes in the dish with 1/2 tsp of salt and pepper, 1 tbl of shallots and about 3 tablespoons of cream. Evenly sprinkle about 1/2 cup cheddar cheese. 

This is your first layer. Simple, but awesome. Now layer more potatoes on top of the newly sprinkled cheddar cheese. Lay on your next 1/2 tsp salt and pepper, 1 tbl shallots and 3-4 tbl cream, and  finish with 1/2 cheddar. Finish out the rest of your ingredients. Cover the dish with foil and bake for 1 hour 15 minutes.


Thursday, December 6, 2012

On a Snowy Night, there is Mediterranean Turkey Meatloaf

There is life after Thanksgiving...

The meal was sweet, savory and delicious, but after Thanksgiving, is there still room for turkey in your life?
Many moons ago (well, maybe 6 1/2 years to be fair) I adopted Weight Watchers as a way to manage my food intake. After the post college and early marriage years of eating to excess, and whatever and whenever I wanted, I needed a reality check as to what was an appropriate food choice and portion size.

I used to be able to consume-in one sitting-an ENTIRE Papa Murphy's take and bake cheese bread (with extra cheese.) That's 1749 calories, 54 grams of fat. Nutritional Info

Thank you Weight Watchers for reminding me I really should only eat two slices, and if I drink some water and have a conversation, I would then be full. With weight watchers, I began to learn the limits of my nutrition, and looked into new foods. Its then that I fell in love with ground turkey, the holy grail of Weight Watchers protein. (Besides fish, that is.) 

Ground turkey helps keep post meal insulin low and is lower fat than red meat (although I have nothing against red meat in any way.)

I have a ton of ground turkey recipes, and tonight I employed a favorite to share with my family, as the promise of snow in Montana tonight created in me another turkey craving.

Mediterranean Turkey Meatloaf

Ingredients:

1 pound ground turkey
1 1/2 cups stuffing, wetted with 1/3 cup water
2 eggs
1/2 cup feta cheese 
1/2 cup Parmesan cheese, plus 1/4 for sprinkling on top
1 tsp Italian seasoning
1/4 cup snipped sun dried tomatoes

A NOTE on sun dried tomatoes. I don't dry mine in the sun. I do, however, take my ripe Romas in the summer and run them through the dehydrator, then store them in a freezer bag in the freezer. They are sweeter and have a lovely concentrated flavor.

Set you over to 375 degrees. In a small bowl, put your stuffing in and wet it with about 1/3 cup of water. Use your hand to mix it about until the water is absorbed. 

In a large bowl, put in your ground turkey, now wet stuffing, and all other ingredients. Make sure your Parmesan is not green container in the fridge fake Parmesan. Spring for some real stuff.

Be a He-Woman and use your hands to mix and mash it all about until evenly distributed. Get out a loaf pan, make your mix into a loaf shape, and plop it in the pan. Sprinkle the remaining 1/4 cup Parmesan cheese on top and bake at 375 degrees for 40 minutes before you use a meat thermometer to check the temp. It'll be ready to come out at 165 degrees.

Tuesday, December 4, 2012

How many food rules does it take to make a crazy lady?

Knock Knock

Who's there?

5 pounds.

5 pounds who? Wait.....what? Go away!

I don't own one, but I know where they live, and they always find me!

I USED TO BE 100 POUNDS heavier than I am right now. A size 20. After my oldest was born around 7 years ago I was 100 pounds heavier, and losing the weight was a long journey and an even longer education in what I am capable of. 

I have a couple, well, maybe more than a couple, food and activity and lifestyles rules I try to follow, although as of late, I have failed (hence the 5 pounds coming knocking.)

Some of these are based off of Michael Pollan's Food Rules, some of them are from other places, but in the interest of disclosure, here they are:

1) Always eat breakfast. If not it'll ruin my metabolism.
2) Always pack my own lunch to work, that way I know what's in it, don't spend money on an unhealthy one, and always eat.
3) Enjoy a family dinner. Sitting at a table is better for so many reasons.
4) When I'm hungry in between meals, I drink water or tea first, then decide if I am really hungry. First impulse to eat usually means I'm dehydrated.
5) We rarely eat out, maybe 2 times a month. Meals are made and eaten at home.
6) No fast food, that means drive throughs-ie McDonalds-We haven't eaten fast food french fries or sandwiches in three years.
7) I don't eat after 6:00 in the evening-my metabolism slows down then and going to bed while still digesting creates for me indigestion.
8) Soda is rare. Almost a never. Water is so much better.
9) We eat alot of probiotics, yogurt, kefir, etc-this helps aid good digestion.
10) I try to be active after dinner, cleaning, climbing stairs, spending time playing with kids, and when its light out walking the dog. 
11) Hot yoga! I do barkan yoga at HOT YOGA HELENA and adore it. This I have slacked on lately as the class I typically go to is at 6 AM and I have needed my sleep lately! 

Well, since I haven't posted in awhile, these are some of my bizarre food thoughts....enjoy ;)


Friday, November 23, 2012

A Special Casserole of Oysters on Thanksgiving

Fish Among Fowl, The Oyster Casserole

I buy them in the jars, and so far have never had them fresh...someday!

One of the finer traditions on Thanksgiving for my family is not the turkey or the potatoes, although they are amazing, it is the casserole of oysters, passed down from my grandparents to us. My side of the family are not Montana stock, but from the East coast. From them we have the tradition of an oyster casserole that slides along side of a green bean casserole on special holidays.

Here is my grand father's recipe:

Ingredients:

1 pint of oysters, in their juice 
1/2 cup salted butter + 1 tbl butter for greasing dish
3/4 cup whole milk
1/4 cup oyster liquor (the liquid from the pint should be enough)
1 teaspoon Worcester sauce
1/2 teaspoon salt
1 cup diced celery, with leaves
2 tablespoon fresh parsley leaves 
Pepper to taste
2 cups crushed saltine crackers

Grease a medium casserole dish with butter.

Drain your oysters but reserve the liquid into another container. Add the milk and Worcester sauce to the oyster liquor.
 
Melt the rest of your butter and pour over crushed crackers and add the salt, mixing until evenly distributed. 

Chop your celery and parsley and set aside.

Spread 1/3 of your crackers on the bottom of the casserole dish and sprinkle with black pepper. Cover with 1/2 the oysters, 1/2 the celery, and 1/2 the parsley leaves. Make another layer of 1/3 of your crackers, the other half the oysters, 1/2 the celery and 1/2 the parsley leaves and sprinkle with black pepper. Finish by evenly pouring the rest of the crackers. 

Pour your liquid over the top of the casserole, drizzling evenly over each area of the casserole. 

Bake at 350 degrees for about 40 minutes. To check for doneness tip the dish and see if liquid seeps to the top. If there is a bit seeping, let it go for a few more minutes. 

Yummmmmm.


Saturday, November 17, 2012

Forget Costco! Birthday Cupcakes from the HOME Kitchen

Honestly Easy Birthday Cupcakes: 

Pistachio Pudding Cakes and Strawberry Cupcakes

Sweet strawberry cupcakes that put Costco to shame-and yes, this picture is of the cupcakes I baked :)
I PASSIONATELY DISLIKE COSTCO CUPCAKES. There are those that enjoy the refined sugar high and following crash, but I do not, and neither do the lower intestines of my children. 

Today is an early birthday party for our almost 5 year old's, and while I conceded the location (I would rather be at a museum, but alas we are headed to a bounce house collection) I would not concede the treats. 

Thanks to one of my favorite websites, Eat, Live, Run, I found two sweet recipes for the crown of adult friends, family, and preschoolers that we'll be seeing very soon.

These cupcakes were very inexpensive too, if you keep standard baking supplies in your pantry its pretty simple.

Mmmmmmm, PISTACHIOS!
The first recipe is for our first grader, and the adults that will be in tow. Its a little more grownup, but for those that like pistachios, its delectable. This recipe is not mine, but now that I have the basics, I'll be expanding into several different versions!


The cupcakes in this recipe (follow the link) are only three ingredients!

For strawberry lovers, only!


This second recipe is our preschoolers request. He ADORES strawberries and wanted some cupcakes desperately that reflected his love. So yes, I made my 5 year old BOY pink cupcakes, but its exactly what he wanted, and they are fabulous, so who can complain!? 

Make sure to use organic strawberries. Although they are not in season in Montana (its November) its a pretty good assumption that non organic berries are covered in pesticides, even after being rinsed, and I think organic just tastes better!

Friday, October 26, 2012

Old Mother Hubbard had some Nourishing Wisdom

Hubbard Squash Soup with Sage and Cream

Blue green, bumpy and sweet to boot!
Very good friends of ours introduced us to the Hubbard squash. Funny looking as it was they swore up and down they were fabulous and that prepared in a soup there was nothing that could beat it.

Tonight, a Friday night, I had planned to make my soup, but around 2:11 PM I began to doubt my will power. I was tired after a week of getting up for yoga at 6AM (ok, well maybe twice), chasing three little boys and working 40 plus hours. 

With some proper motivation from friends to avoid calling out for dinner (a comment akin to "fight the man" was inserted somewhere in there) I did indeed prepare the soup, based on a recipe from a friend but modified for what I did and did not have in my cabinet.

Here's how I did it.

INGREDIENTS: * means its local

1 medium sized Hubbard squash *
2 tablespoons olive oil *
1 shallot, minced *
4 garlic cloves, minced *
1 quart homemade chicken stock *
1 teaspoon salt
1 teaspoon black pepper
1 teaspoon dried sage
1/8 teaspoon cinnamon
1/8 teaspoon nutmeg
1/2 cup heavy cream
1/2 sour cream

Set your oven to 300 degrees. Cut your Hubbard squash in half and cut out the seeds. Rub half a tablespoon of olive oil on each half, cover with foil and roast in your oven for 45 minutes as the flesh softens and cooks.

When your squash has about 20 minutes left, heat your remaining tablespoon of olive oil in a stock pot and saute your minced shallots and garlic for 5 minutes or so until they are softened and browning. Add your stock and spices and allow to simmer until your squash is ready to come out of the oven. 

Remove your squash and be careful not to burn your hands. Spoon the soft flesh out of both halves and into your stock pot and continue to simmer for another 15 minutes. Turn off your stove. Add your cream and sour cream and use an immersion blender or food processor to blend your soup into a creamy texture.

DELICIOUS!!!


Tuesday, October 16, 2012

James Taylor, Mint Green, and Butternut Squash Mac and Cheese

Thriving in Squash Season

Oh the goodies, so many kinds!

This week was the official last week of my fabulous CSA, Western Montana Growers Co-op. We are deeply saddened harvest is over and for my last request, I ordered several squashes to store in my pantry. We received spaghetti, Hubbard, red kuri, pumpkin and many butternut squash because it is my ALL TIME FAVORITE!

This week we'll be making, and time permitting blogging, two different butternut dishes, and tonight with the rain and the wind, there were three things I needed to get through the evening with three little boys, James Taylor, mint green tea, and butternut squash mac and cheese.

Butternut Squash Mac and Cheese

INGREDIENTS: * means its local

2 tbl butter *
2 tbl minced shallot *
1/2 large butternut squash, cubed into 1 inch pieces *
1/2 cup white wine (if you don't keep wine, just substitute for more chicken stock)
3/4 cup chicken stock * (homemade is best but canned will do)
1 cup whole milk *
1 cup (plus 1/2 cup for later) shredded sharp cheddar cheese *
1 cup  (plus another 1/2 cup for later) mozzarella cheese *
1/4 cup grated Parmesan
3/4 cup seasoned breadcrumbs
2 cups dry pasta, your choice, cooked until tender 
1/2 tsp nutmeg
1 tsp salt
1 tsp black pepper

Put a large pot of water on to boil and begin cooking your pasta according to package direction until tender. 

In a large sauce pan melt your butter and saute your shallots for about 5 minutes until translucent and fabulous smelling. Add your cubed squash and saute in the butter and shallots for another 5 minutes. 

At this time, add your wine and broth and simmer, covered, until your squash is very tender, to the point of mashing with a fork, about 15 minutes. When tender, add your milk and then blend until smooth with an immersion blender or in a food processor.

Turn your oven on to 325 degrees.

Return sauce to low heat and slowly add and stir your first cup of cheddar and mozzarella until they melt into the sauce. Add your salt, pepper and nutmeg and maintain on a low heat, stirring occasionally.

When your pasta is finished cooking, drain and add the pasta into a medium sized, oven safe casserole dish. Pour your fabulous sauce into the pasta and mix it about. Sprinkle breadcrumbs, Parmesan cheese and the remaining shredded cheese to the top and bake at 325 until the sides are bubbling and the crumbs appear a bit brown, about 20 minutes. Keep an eye on it as if it has stopped bubbling, it is starting to go from gooey to pastey.

Enjoy!


Tuesday, October 9, 2012

Delicious and Nourishing (Not Lunch Lady) Salisbury Steak

I had this salt and onion carving, and made it come true!

   
Why do you taste so good with salt and meat?!

I usually hate the idea of school lunch and my first grader brings a home packed cold lunch almost every day of the week. Occasionally, he will indulge in corn dog day, his favorite of all hot lunch days. Confession, my favorite was Salisbury steak and mashed potato day, and I was craving it in a crazy way.

I therefor declared I would find a way to make it in a not gross way, and tonight, I mastered that, and then some!

INGREDIENTS!

1 pound 85/15 ground beef
1 dinner roll, crumbled onto a cookie sheet and turned into bread crumbs
1/2 cup minced onions
1/2 teaspoon salt
1/2 teaspoon black pepper
1 pastured egg
1 tbl Worcestershire sauce 

Flour for dusting
2 tbl butter

parchment paper
1 large cast iron skillet

Turn your oven on to 350 degrees. Take a dinner roll or two slices of artisan bread and crumble it onto a cookie sheet. Bake in your oven for around 5 minutes, not burning the crumbs but drying them out.

In a large mixing bowl, add your beef, egg, onions, salt, pepper and Worcestershire. Pull your bread crumbs from the oven and allow them to cool. Add the crumbs to the bowl and with your hands mix thoroughly. 

Put a sheet of parchment paper on a plate. Separate your beef mix into eight equal sized balls. On the first layer of parchment, place four balls and flatten them to less than 1/2 inch thick, closer to 1/4 inch. Dust with flour, then lay down a piece of parchment paper on top. Take the next four balls, flatten them into 1/4 to 1/2 inch patties and then dust with flour.

Allow the patties to sit and mellow at room temperature for about 30 minutes.

Heat your cast iron skillet to medium high heat and melt your butter. Add four patties, flour side down, and sprinkle the tops with a bit more flour.

Cook until the edges start to look more brown than pink, about 5 minutes, then flip. Cook for another five. Remove and allow to rest on a plate while you cook the next batch.

We ate ours alongside mashed potatoes and butter poached carrots. Soooooo yummy!


Sunday, October 7, 2012

Ham and Pea Soup and Quick Yeast Rolls

My crock pot is so special to me, I honestly should name it...

Seriously, I adore my little crock pot and have used it so much lately, I free it will soon break. 

Its perfect for nights you know you'll be rushed, days you need to smell something good when you walk in the door, and avoiding the "oh crap soccer's over at 6:30 and I can't make anything for my hungry kids in the 30 minute window we have before bath time" phenomena.

Last night was Saturday night, when as a family we make the trek to mass. Our church is honestly only six blocks from our house but with a 6, 4, and 2 year old its a trek nonetheless. An an exercise in patience for my husband and I who try to keep our trio of not so tidy gentlemen managed in a neat enough way so as not to get "the eye" from the old ladies surrounding us.

By the time we get home, everyone is hungry, and goofy. I cannot cook and wrangle after an hour of patience exercising. This is when I whip out the crock pot. Last night we had ham and pea soup made with homemade chicken stock and leftovers of our Easter ham (it was frozen, I promise no one ate mold.)

Here is how I managed to serve an all day dinner as soon as we came home:

Ham and Pea Soup in the Crock Pot

Mmmmmmmm. Peas.

A few disclaimers here. Part of getting the savory flavor of a well loved meal is prepping ahead. There were a few parts that needed done ahead of time. 

One is if you use dried split peas, as I did, you HAVE TO SOAK THEM in twice as much water as peas for 24 hours ahead of time or they will never cook right. 

Two is for the best tasting soup, using homemade chicken stock is a must, but you can used canned if you don't make stock. I make stock out of every chicken carcass we roast, one or two times a month, and then freeze it for later. Alice Waters chicken stock recipe is my favorite.

Ingredients:

6 cups chicken stock (home made or store bought)
2 cups dried split peas (make sure to soak them for 24 hours at least in 4 cups water, then drain off the water before adding)
2 cups cooked ham (I froze extras from Easter and then reused it last night, ham freezes amazingly well)
1 cup chopped celery
1 small yellow or white onion, chopped
3-4 chopped carrots
1 cup chopped green cabbage
1 bay leaf
Salt and Pepper to your taste

Here's how it goes:

STEP 1: Walk into the kitchen in your bathrobe, make coffee, drink coffee, check Facebook on your ipod touch. OK, you don't have to do this part, this is how I started off though.

REAL STEP 1: Get out your crock pot. Ours is not huge, actually pretty small. Chop, then add in your veggies, peas, bay leaf, ham, spice, and last put in your stock.

STEP 2: Set crock pot to  high for the first 4 hours, low for the next 4-6 hours. Give it a good stir when you remember, once or twice out to do it to mix things up a bit. 

To go with, I premade (baked in the afternoon then sealed in a container) some yummilicious rolls. Here is the recipe for those, they were a fabulous addition to our soup meal! Quick Yeast Rolls from All Recipes


Sunday, September 23, 2012

You MUSY Try this: Crock Pot Apple Butter

This Season's Discovery: Crock Pot Apple Butter

It Montana apple season, and they're coming in droves!
I have fond memories from being 7 or 8 years old and going to an apple orchard. It must have been in Nebraska, where we were living at the time, and I remember cider, hay rides, and all around fall fun. Maybe that's why when we had the chance to buy a house with three mature apple trees, we jumped on it.

Apple can seem so blah when all you eat or buy are the red apples from Wal-Mart and they are the same, bland fruit over and over. We are so fortunate in Montana to have great apple weather and tons of varietals of apple. This week in our CSA box we received several bags of beautiful pinkish apples, sweet but crisp. We've eaten plenty raw, but with the extras today I am making the easiest and most delicious and easily storable item, APPLE BUTTER!

My grandmother's made this beautiful concoction, but this year is the first I have ever tried it. It amazingly simple, totally cannable, freezable, and store in the fridgeable, and I have some in my crock pot right now! We eat it on bread, in yogurt, on pancakes, or by the spoonful for a treat. Try it, its easy.

You'll need:

A crock pot (our is medium sized, not large and it works fine)
A sharp knife
A vegetable peeler
1 Cup Sweetener (sugar, honey, Steevia, what have you)
2 Tablespoons Cinnamon
2 Tablespoons Apple Cider Vinegar
Apples (any variety, about a dozen medium sized for us)

Here's How:

Peel your apples and cut them into quarters. Don't use the core. 

Put them all in the crock pot while it is still off. 

Add your sweetener, vinegar, and cinnamon. 

Put the lid on and turn your crock pot on high for the first hour. 

Turn it back to low and allow it to go ALL DAY, eight hours or more. 

For the last hour take the lid off, turn it to high and let it bubble with the lid off. Occasionally give the contents a stir throughout the day but no need to babysit it. 

When finished, it is molten hot. Your can store it in canning jars in the fridge, but allow it to cool overnight before you put the lid on and put it in the fridge. You can also can it, but I have not attempted this yet. 


Tuesday, September 18, 2012

Bulbous Purple Nightshade Tale

Eggplant Parmesan ala Busy Mom

Many varieties, many uses :)
This week in our CSA box, we snagged two purple beauties, and the first thing that came to my mind with eggplants was Parmesan!I was hoping it would be more fall like this week but today was more smokey than anything. I still wanted this cheesy goodness so baked it even thought the weather wasn't perfect for it.

Eggplants, when cooked wrong, are chewy and can turn you off of dinner quickly. I perused the internet and found a few ideas to create the following dish delish! I used my own canned tomato sauce for this recipe, but I'm sure you can use store bought just as well. The home canned sauce was amazing though, and organic and cheap because I made it!

And it wasn't all that hard!

Preheat your oven to 375 degrees.

Ingredients: * means its local

2 medium eggplants *
3 eggs *
1 sleeve saltine crackers
1/2 cup flour *
1 tsp garlic salt
1 tsp dried oregano *
1 tablespoon salt

3 tbl olive oil

2 pints spaghetti sauce *
3 cups shredded cheese (we used Parmesan, cheddar, and Monterrey jack) *

Slice your eggplants into 1/2 inch rounds, put them in a colander and rub with salt, allow them to sit for an hour if you have the time, 30 minutes if you need less.

In a small bowl, whip your eggs with a fork until thoroughly combined. In another medium bowl, crush your crackers and mix them with the flour, garlic salt, and oregano.

Blot your eggplants on paper towels. Heat a pan to medium high heat with your oil in it until the oil shimmers. Batter your eggplant pieces in egg first, then flour mixture, then egg again, then flour mixture again. Saute them in the oil for 6-8 minutes a side, until golden brown but also allowing the middle to soften and the batter to crisp.

Fry your eggplants in batches until done and set them aside.

In a baking dish (I used an 8X8) pour a pint of sauce on the bottom. Then add a layer of fried eggplants and then 1/2 of your cheese mixture. Add another layer of eggplant, another pint of spghetti sauce and the rest of your cheese.

Bake at 375 for 35-40 minutes or so, and when you remove them, let them sit for ten minutes before serving. They were crunchy, cheesy, saucy and awesome!


Monday, September 10, 2012

Like a Nerd on Date Night, Fumbling through Chile Rellenos

Peppers, Peppers, Peppers, Cheese and Spice!

Hellooooo handsome!
This week our delightful CSA sent us bell and poblano peppers, the likes of which were shiny, firm, beautiful and fabulous. I held them in my hands and thought about the delicious possibilities. Peppers contain high amounts of vitamins C and A, and when I have the chance to make a filling dish based on veg and not meat, I will take it! From these thoughts, I started to fumble through chile rellenos, a Mexican version of stuffed peppers, and here's what I ended up with:

Ingredients: * Mean its local

6 peppers (any kind, I used poblano and bell) *
2 tablespoons olive oil
1 cup bread crumbs (panko have a good crunch but any are fine)
1 cup shredded cheese (we used raw milk cheddar, half for the filling, half for the topping) *
3/4 cup fresh cilantro, torn or chopped *
1/2 teaspoon cumin
1/2 teaspoon pepper
2 diced garlic cloves *
1 cup milk *
4 eggs *
1/2 cup flour *
1/2 teaspoon salt
1 teaspoon baking powder
1 slicing tomato *


STEP 1:

You'll need 6 peppers of your choice, I used 3 poblano and 3 bell because I was not sure how spicy the spicy peppers would be in the end (mild heat, by the way.)

Rub the peppers in olive oil and put them on a baking sheet under your oven broiler. Turn it to high and let them roast and blacken their skins for about 4 minutes before turning them with tongs to blacken the next side.

After each side is pretty black and charred, but not smoking or on fire, take them off your baking sheet, put them in a lidded rubbermaid container or ziploc bag, and seal them in for a good ten minutes while they cook down and the skins loosen up.

After ten minutes run some cold water from the tap, rinse off the peppers and peel off the skin. Set your peppers aside.

STEP 2:

Prepare your stuffing! I used 1 cup of bread crumbs, 1/2 cup shredded raw cheddar cheese, tear up about 1/4 cup of cilantro and mix it in with 1/2 teaspoon cumin and 1/2 teaspoon pepper. Add in 2 diced garlic cloves and stir it all together.

STEP 3:

Ready your batter! In a food processor, with a stick blender, or even with just a fork, mix together 1 cup milk, 4 eggs, 1/2 cup flour, 1 teaspoon baking powder and a pinch of salt.

Step 4:

Stuff your peppers! Set aside your choice of cheese in six large chunks, cheddar, Monterrey jack, your choice, for ease I used mozzarella (its what I had!) Oil a baking dish and set your peppers inside of it. Put a generous spoonful of stuffing and piece of cheese inside each pepper (they will fall apart a bit, no one will care!) One they are all stuffed, pour the batter on top of them, slice up a tomato and layer it on top of the batter, tear up about 1/2 cup of cilantro and drop it on top of the tomatoes and sprinkle more cheese, your choice on top of that.

STEP 5: Bake! For 35 minutes at 350 degrees.

We ate our covered in salsa and sour cream and they were awesome!


Monday, September 3, 2012

Gringa Green Tomatillo Enchiladas

Trying Something New with Montaxican

I tried these for the first time yesterday, and it was delightful!
Continuing my exploration into new things, this week I received a bag of tomatillos from our CSA. These little green guys look like baby tomatoes but are in fact relatives of the gooseberry. I scoured the internet for ideas, my cookbooks not offering much inspiration. After combing a few sights I decided to experiment in roasting my own green enchilada sauce using these instead of green chiles.

I took inspiration from the tomato sauce I make and for the first time ever, canned last week. I used the lovely green sauce in some enchiladas that I put in our oven on a timer so we could go to Saturday night mass and come home to a fully cooked, delicious meal.

Here's what I tried out:

Gringa Green Enchiladas

Ingredients: * means its local

1 pound tomatillos *
1/2 walla walla onion *
1 jalepeno pepper *
1 bulb garlic *
2 chicken bullion cubes
2 teaspoons cumin
1 teaspoon coriander
1 teaspoon black pepper
 1 tablespoon olive oil

8 eight inch corn tortillas *
1 pound pork sausage *
1/2 cup cooked corn kernals *

2 cups shredded cheddar cheese *
1 slicing tomato *

In an oven safe dish, put your skinned tomatillos, chopped onion, diced pepper, crushed garlic, bullion cubes, cumin, coriander, black pepper and olive oil. Mix it with your hands and then put it in the oven at 425 degrees for about 30 minutes while it roasts and mixes its flavors.

While your sauce roasts, cook your ground pork sausage in a large skillet until done, and then add the corn when it is almost finished.

When your tomatillos are done roasting, remove from the oven, allow it to sit until its done bubbling and then pop in in your food processor or blender and pulse until creamy and smooth.

In another oven safe dish, fill your tortillas with your pork mixture and a bit of cheese. Roll the tortillas shut and place them seam side down. Fill all your tortillas and when done, cover with your gringa green sauce, then slices of your tomato, then your shredded cheese.

Bake uncovered for 35 minutes at 375 degrees. Allow to cook a few minutes, and then enjoy!


Tuesday, August 28, 2012

Getting Yours Hands on Some Solid Meat and a Mean Taco Salad

Well, I Submitted to the Call of the Wild...

I bought some of you big fellow, thank you for your gift to my delicious meals.

Don't get me wrong, we are still flexitarian, eating meat only a few meals a week, but with winter approaching, no meat in the house, and my parents taking a break from raising animals this year, we needed a little something for the occasional meat eater in us all. 

There are any number of retailers that sell, local, quality processed, good tasting meat. Wal-Mart is not my go to, as you know. I have bought from the Kitteredge's at Bird Creek Ranch in Cascade, MT, and it is fabulous. I have procured from Montana City Meats at the Farmer's Market in Helena. This week, I went to Tizer Meats, a local butcher that sells its local meat in bundles for the penny pincher in all of us. Tizer Meats is a fine old time butcher and they had a coupon, so I tried, and have so far enjoyed. I bought a "family pack", and by my estimations enough meat to get us through the winter, spring, and maybe longer for $90. 

Tonight, I made my first batch of meal with ground beef, some mean taco salad, and I was pleased. It was fabulous, and here it is:

Mean Taco Salad

Ingredients: * means its local

2 tablespoon olive oil
1/4 walla walla onion, chopped (about 1 cup for us) *
1/4 red cabbage, chopped (about 2 cups for us) *
1 pound ground beef *
1 package taco seasoning (yes I cheated here)
1 cup whole skinned tomatoes *

8 corn tortillas, cut into quarters *
several pinches of salt
1 tablespoon olive oil

2 cups chopped lettuce *
1 cup shredded cheese of your choice *

Heat your oven to 350 degrees as you cut your tortillas and use your hands to spread about 1 tablespoon of oil over them. Spread them on a cookie sheet, sprinkle with salt and bake for 15 minutes or so.

While baking (and watching to avoid burning) chop your onion and cabbage and saute in 1 tablespoon of oil for about ten minutes. Add your ground beef and brown it, no need to remove your veggies. Add 1/2 cup water, taco seasoning, and cook until no more liquid sits around in the pan, maybe 5 minutes.

Remove chips from oven and cool. Add meat mixture on top of the chips and sprinkle with cheese and chopped lettuce.

Yum.


Thursday, August 23, 2012

Triple Chocolate Zucchini Bread for Three Boys and a Pregnant Friend

I Love Chocolate and as I remember, so Do Pregnant Ladies

Ah zucchini, you go in everything!


Prepare yourself for a bit of a hippie soliloquy here: Hy heart chakra has been a bit blocked lately. I am not as free giving with my time, talents, and blessings as I could be and so am trying to remedy this, and quickly. If your chakras are out of balance, you can feel it, and I can feel it. Doing yoga, wearing necklaces and the color green, and giving freely are ways to ground yourself. Today, I am trying to ground myself through giving, or preparing to do it.

I have about two dozen pregnant women in my life right now, and for the first time in my life, I am not one of them. I loved being pregnant. I did it well. I loved every moment of it, and part of me thinks we could totally have a fourth. Reality dictates, however, that three is our limit, and I love my boys dearly. I will, therefor, get my pregnant and baby highs off my friends, and the next one due is my fabulous yoga instructor Nicky. Nicky, mind you, has been doing hot yoga every week she's been pregnant, and still kicks everyone's but. Nicky, if you read this, when baby Charlotte Shanti comes, I'm bringing her a present!

Triple Chocolate Zucchini Bread

Ingredients: * Means its local

Preheat oven to 350 degrees, this makes two loaves

2 cups whole wheat flour *
1 cup all purpose white *
1/2 cup cocoa powder
1 teaspoon baking soda
1 teaspoon cinnamon
1/2 teaspoon cloves
1/2 teaspoon baking powder
1/2 cup golden flax seed *

2 eggs * 
2 cups sugar
2 cups shredded zucchini *
1 teaspoon vanilla
1 cup chocolate chips
1/2 container chocolate frosting
1/2 cup milk *

Mix dry ingredients (top list) in a large bowl. Mix wet ingredients (bottom list) in a medium sized bowl. Add wet to dry, mix until combined, and bake in two greased loaf pans for 50 minutes or until a knife comes out clean.

I think it might be good with butter :)

1 teaspoon salt


Monday, August 20, 2012

More Montaxican with a Corn Tortilla Casserole

Still Experimenting with this Whole Flexitarian Thing

Michael Pollan in my secret boyfriend.
When I first started reading Michael Pollan several years ago I fell for him, hard. I am happily married, mind you, and my husband and I have been together for nearly 10 years, but my hubby had some competition around the time I started reading about food rules, responsible eating, and how someone besides me felt McDonald's was essentially wrong.

Michael Pollan taught me about being a flexitarian, or a vegetarian, more or less, that indulges in meat a few times a week instead of a few times a day. We dove in, first because we wanted to eat responsible meat, then because it was economically sound, and finally because it felt physically better. 

I shall try to avoid too much information here, but after a meat heavy meal, my family and I experience a phenomena we refer to as "the meat bloat" where we have heavy stomachs that don't seem to diminish after hours of digesting. Sometimes it takes 24 hours of vegetable eating to right us. After my brother's wedding last summer where every course was meat heavy (responsible meat, but meat nonetheless) my family ended up at the oasis of Norris Hot Springs the day after and scarfed down salad after salad, craving the veggies to balance us out.

Now, we still buy little meat, occasionally indulge at BBQs and friendly gatherings, but rely mostly on the veggie stuffs. 

We eat tons of black beans, quinoa, tofu, cheese, and leafy greens for out protein and iron. Sunday supper was a good feast, and a meatless one at that.

Corn Tortilla Casserole

Ingredients: * means its local

9-12 small corn tortillas *
1 cup cooked corn kernals *
1 can black beans
4 green onions, chopped *
2 heirloom tomatoes, diced *
1 yellow crookneck squash, diced *
8 ounces sour cream
2 cups shredded sharp cheddar cheese
1 jar salsa

Preheat oven to 375 degrees. In a bowl, mix your onions, black beans, tomatoes, squash and corn. Shred your cheese and set aside. 

Layers your casserole with three tortillas on the bottom, 1/3 the veggies mix, then 1/3 the salsa jar, and 1/3 the cheese. Continue this way and if possible mash three corn tortillas on the top of the casserole and add remaining cheese on top. Bake covered for 20 minutes. Remove cover and bake for another 10-15 until the tortillas on top are crispy not burned.

I let it sit for a few minutes to gather together, but there was still some loose nature to it, like any good casserole. Serve with lots of sour cream on top, or if you like sour cream dolloped on each layer before you bake it.


Wednesday, August 15, 2012

Celebrating the Cold, Julia Child, and the Harvest with Rich Celery Gratin

I loved you Julia Child, and still do! Thank you for introducing me to the idea of butter, butter, and more butter!
Today was the first cool day in a summer full of 90s and 100s. In Montana that is odd and in my many years of living here, I do not remember the heat like this. I decided quickly to celebrate it, and reminded that it was Julia Child's 100th birthday, I broke out the good fat and a head of celery.

I adore Julia Child, and who doesn't. She was an inspiration, living into her 90's and eating good fat all day, she proved incredible.

Celery came in our CSA box this week and it was sweet, beautiful, and extra crunchy. I use it in stocks, mirpoix, and soups but was wanting to be adventurous. I heard about celery gratin, a creamy sort of gratin that uses crunchy celery instead of potatoes. I made something up, and it turned out to be an honor, I home, to Julia.

Rich Celery Gratin inspired by Julia

Ingredients:

3 tablespoons butter
1 head of celery chopped
1/2 sweet onion, chopped
1/2 teaspoon salt
1 teaspoon pepper

2 cups homemade chicken stock (home made is best)
1 cup heavy cream
1/2 cup red wine
cornstarch (about 2 tablespoons)
8 ounces (or 1 package) cream cheese
2 hand fulls shredded cheese -your choice-I used raw milk cheddar

1 recipe biscuit dough

Take a cast iron skillet, plop in your butter and chop your celery and onion. Saute the celery and onion for several minutes in the butter to release the flavor. Breathe it in and love it! Sprinkle with salt and pepper and then add your stock and wine. 

Preheat your oven to 400 degrees.

Turn to high and boil your celery as the mix reduces. After several minutes turn down your heat so it only bubbles, add your cream and stir. Add your cornstarch and thicken. Add your cream cheese in little chunks and stir until it softens and melts. Add your shredded cheese and melt. Turn off your heat and stir until its done bubbling. 

Plop the biscuit dough on top of your creamy mixture in the skillet and put it all in the oven for ten to fifteen minutes until the dough is cooked, fluffy and lovely. 

This, my friends, was a very creamy, deeply nourishing and satisfying dinner.


Saturday, August 11, 2012

What Have We Been Eating lately? Like a Montana Summertime of Course!

Raisin Oatmeal Hand Cakes, Montana Plate, and Caramelized Onion and Fennel Pesto Pizza

Lunch. The Montana Plate. Yum.


I have not been writing lately. Bad me. Does that mean we've not been eating? Well, I've been busy trying to get back in the groove of yoga at my awesome hot Barkan yoga studio here in Helena, attending fabulously friendly BBQ's and driving about the Lewis and Clark National forest for work, getting 12 passenger vans high centered on beetle kill stumps. We have not been starving however, my family has been eating well, my boys like little princes. Take today for example, we had hand cakes for breakfast, a sliced meat and cheese and veg tray for lunch, and a fabulous pizza for dinner! Here are a few of the recipes and ideas before I move on to finishing my Mary Roach book before bedtime.

Raisin Oatmeal Hand Cakes

(Essentially Pancakes, but without the need for forks or syrup, almost a scone, but not.)

Ingredients: 
1 1/2 cups whole wheat flour
1/2 cup oats
2 teaspoons baking powder
1/2 teaspoon salt
1/2 cup raisins
1/2 cup chocolate chips
1 pastured egg
1 cup orange juice
1 cup whole milk (or cream)
1/4 melted butter
1/2 cup unrefined sugar

Essentially, it goes like this. I heat up an electric griddle for the ease of quick production. Mix the dry ingredients plus the raisins in a big bowl. Mix the wet ingredients in another. Combine. You'll want a stiffer dough than pancake dough. Plop, drop, and cook them at medium heat. I served them with a smidge of butter on top. No forks, just hands. They were delicious cold as snacks this afternoon too.

the Montana plate

From our co-op this week I added on a few fine items we are truly enjoying. Raw milk cheddar cheese from the Lifeline Dairy in Victor, MT, beef salami, made without nitrates from the same place (no we're not totally vegetarian yet :). We also added on an extra bag of Flathead cherries, the sinfully delightful phenomena that descends upon all of Montana at exactly this time of year, every year. Lunch today was the pretty plate at the top of this entry, sliced salami and raw milk cheddar, cucumber slices and cherries, cherry tomatoes from the farmer's market this morning in the gulch. All in season, local, and fabulous. My little men love being able to grab and eat and share together at the table and everyone has a favorite part. It was all, toatally, Montana

Caramelized Fennel and Onion Pesto Pizza with Charred Cherry Tomatoes

Ingredients:
1 foccacia dough recipe (one of my first entries :)
4 hearty spoonfuls of pesto
1 heavy cup of shredded raw milk cheddar
1 heavy cup of shredded jack cheese
handful of cherry tomatoes
1 fennel bulb
1 sweet onion
1 tablespoon butter
1 tablespoon olive oil
1 heavy pinch salt
sprinkle dried herbs, basil or oregano

About an hour before you'll want to bake your pizza, chop your fennel and slice your onion. Put them in a nice wide skillet with your butter and olive oil at medium heat and allow them to saute, stirring every few minutes, for that hour so they can caramelize. This will take almost an hour. About thirty minutes into your saute, make your foccacia and allow it to rise. At the hour mark, place your dough on a pizza stone or cookie sheet. Press it out with your hands and plop your pesto on top, smearing it with your hands. Place your cheeses on top of the pesto and add on the caramelized goodies and sliced cherry tomatoes. Sprinkle with herbs and bake for 18 minutes at 425 degrees, checking often.

It was good.


Thursday, August 2, 2012

Montaxican Dinner

Venison Carnitas and Spanish Cream Wild Rice with 

Peppers and Corn

Its almost corn season in Montana, so we are desperately trying to finish last years frozen kernals.
Tonight was a fun opportunity as grocery shopping eve to indulge in some Montaxican food. Mexican is typically too spicy for my kiddos and honestly, I don't have a knack to do it authentically. Therefor, I fudge it and do a milder, more locally friendly version. Tonight, I sacrificed our last white tail doe roast to the crock pot to make carnitas and whipped up some delicious Spanish style rice for the timid.

Crock Pot Venison Carnitas for the Tame

Ingredients: * means its local

1 small (about 1/2 pound) venison roast-any cut is acceptable *
1/2 liter V8 
1 bunch chopped green onions *
4 gloves crushed garlic *
1 bunch cilantro *

Put all ingredients in your crock pot. Turn it on low. Let it sit and do nothing to it for 8 hours. Then pull it apart with two forks and you have Montaxican carnita meat.

Spanish Cream Wild Rice with Peppers and Corn

Ingredients: * means its local

2 1/2 cups chicken stock
1 cup wild rice
4 cloves minced garlic *
1/2 cup pizza sauce
1/2 cup green onions *
1 cup cooked corn kernals *
1 pepper (red or yellow) diced
1/2 cup sour cream
cumin and chili powder to taste

Put your stock on to simmer in a covered pot. When it hits boil, add your rice and garlic. Turn it down to medium and allow to simmer for a good hour and a half, watching it carefully to make sure it doesn't stick or burn (if it does, add water.) When it is tender but still a bit crunchy, add your pizza sauce, peppers and green onions. Add your corn. Add cumin and chili powder to taste. Allow to cook for 5-10 more minutes, remove from heat, add sour cream, and stir.

Yummmm.

Monday, July 30, 2012

Give me a cast iron, some butter, and a glacial lake!

Skillet fries with herbs and scapes and 

lentil burgers with balsamic pesto spread

All I needed were some trusty cast iron skillets, carefully planned food and a heck of a view to make lunch yesterday for 10 lovely members of my family in Glacier Park!
We go camping at Glacier National Park at least once a summer with my parents and brothers, although one was conspicuously absent due to a "gig" and the fair. This year I was determined to help in meal prep as last year I left my father to most of the duties (which to his credit, he still did follow, and he is such a great cook!)

We knew we would not be at our camp site but at Lake McDonald, one of the most beautiful glacial lakes in the world, in my opinion (although my travel scope is rather limited.) I planned on something with my little Coleman stove and something fairly quick to hungry swimmers and boaters.

I decided on camping fires (an idea from a friend of mine that camps far more often than I do) with garlic scapes and other herbs and lentil burgers, items I have created on my own, but for ease this time around I ordered from my CSA the week before our trip (someone there makes them, joy!) For the lentil burger I made a balsamic pesto from scratch to lather on the buns as the burgers were served, and they were delish!

Herbed Camp Fries with Scapes

Here's what I did. Take as many potatoes as you think you'll need for fries (I used 4 large russets and it was plenty for 10 people.) Cut them into french fry shapes and par boil them briefly, until not rock hard but not mushy. Put them in a big zipper plastic bag, add a cup or two of garlic scapes and chopped green onions, chopped fresh parsley, salt, pepper, and a few big gobbs of butter. 

When ready to cook these beauties, I heated my cast iron on medium heat, through them in and occasionally turned until cooked and brown, num!

Lentil Burgers with Montzarella and a Balsamic Pesto

I bought premade patties, although you can find recipes for these beauties all over the place online. I bought the buns, although I have premade in the past. I did, however, order Lifeline dairy Montzarella (absolutely delsih, by the way.) I also premade a balsamic pesto, which is essentially pesto but when you add in the olive oil, add in a few tablespoons of balsamic too. I toasted buns, heated patties on the cast iron, without worrying about doneness because they were not meat. I melted cheese, threw them on buns and slathered the pesto on top of the inside of the bun. Now I will admit by over zealousness led to a few burgers cold on the inside, but still fabulous and filling to boot! All in all, we filled 10 people for around $18, and made some great memories to boot!


Monday, July 23, 2012

Summer Squash Fritters for the Win and Homemade Hangover Food

Squash Fritters and a Roasted Chicken on Whole Wheat Biscuit with Fresh Pesto Sandwich


A beautiful mountain setting can lead to way too much fun.
Our family spends a lot of time in the woods, and this past weekend was no exception. We were with family at a reunion in the woods outside Lincoln, Montana and as we readied ourselves to leave, we needed to create a dinner Friday night. I knew there would be copious amounts of meat at the reunion, so we decided to stay on the veggies until we visited. 

Our CSA delivery Friday came with our first batch of summer squash, a little yellow crookneck and a green monster that was definitely not a zucchini. I thought and thought and eventually remembered a recipe I had seen in an organic cookbook that compiled recipes by season, not by category. I decided we would make squash fritters, and after we did, they were so salty, cheesy, delicious that no one needed the leftover pork chop I refried alongside just in case. 

Summer Squash Fritters

 Ingredients: * means its local

2 regular sized summer squash, grated *
1/2 an onion, diced *
1/2 cup grated Parmesan cheese
1 egg *
handful fresh parsley, chopped *
1/2 teaspoon pepper
1/2 teaspoon salt
1/2 cup whole wheat flour *
1/2 teaspoon baking powder
1/4 cup oil for frying in a cast iron pan, I did half camelina oil, half olive oil

Grate your squash and toss the salt into it. Mix it together with your hands and put it in a colander to drip off the moisture. Let sit at least 10 minutes.  

Squeeze out the excess liquid of the squash and then put it in a bowl. Add in the onion, cheese, parsley, beaten egg, salt and pepper and mix together.

Add your flour and baking powder mixture to the squash and mix thoroughly. It was very sticky, not soupy, but sticky. 

Heat your oil in a cast iron pan at medium heat. I used a cookie disher to plop little fritters in the oil. I let them cook about 4-6 minutes a side but had to keep checking them.

When done, they were brown and crispy on the outside, but soft and cheesy on the inside, like hash browns, but without potatoes. They did not taste squashy at all either!

Hangover Food aka Chicken in a Biscuit with Pesto

Needless to day, I had too much fun in the woods and spent most of Sunday hurting for it. The breakfast at our reunion of sugar and more sugar did not sound very appetizing after my dinner date the night before with margaritas.

Back in my youngster days of the 20's I loved good hangover food, greasy, salty, fatty, usually McDonalds, to make things right again. Now that we've sworn off the big McD, what now? (Irony, I know, that I'll drink alcohol but not eat fast food, well I picked my poison, and yes, I paid for it in spades.)

I decided on something else delicious, salty, sort of fatty, and delicious

By the time I'd righted myself Sunday I attacked a chicken in my fridge.  Actually, I coated it in olive oil, fresh parsley, lemon juice and minced garlic. I sprinkled it with salt. I roasted it at 375 degrees for about an hour and a half, occasionally adding butter to its crispy top. When it was done,  I peeled off all the beautiful skin and ate it immediately, forgetting about McD's all together.

I baked biscuits. Whole wheat, home made biscuits based on this recipe: Fluffy Biscuits 

I made pesto from fresh basil from our CSA. I used this recipe and ate much of it with my fingers when done:Walnut Pesto.

When all were done, about one hour 45 minutes later, after the chicken rested, I made sandwiches. Pesto, on each inside piece of the biscuit, hot roast chicken, and lusted after the greasy goodness. 

I felt amazing after. God bless good hangover food!