Thursday, February 21, 2013

When in Doubt, There's Always Soup and Pizza

Caprese Soup and "Garbage" Pizza


A few more victories for our meatless adventure were easy and simple when planned ahead for. The first happened on a wrestling night where he had some precious time together at the table before we barreled out the door, and spent it enjoying a nourishing update on tomato soup, topped with thick bread slices, quick and homemade basil cream and juicy mozzarella cheese! Here's the link to explore more :)

Caprese Soup

Another victory was what a friend refers to as garbage pizza. Really, its using all the old veggies from the week on top of a pizza. If you bury them under a layer of cheese, no one notices and everyone gets the nutrients! We had ours with spinach, red onion, garlic, basil and sun dried tomatoes! Here is the link the the pizza dough recipe I use right now, courtesy of Eat, Live, Run! Its labeled as calzone dough, but can be used for either!

Calzone Dough recipe

Monday, February 18, 2013

A Different kind of Burger and Japanese Street Food

Mushrooms and Pesto and Tofu, Oh My!

They meant waiting, but ended in deliciousness!
Here we are on day 6, and continuing to explore the variety that is found in nature to expand our pallets without meat. I love how its made me think outside the box, and its becoming easier every day. Although on a walk with me today my 7 year old mentioned that he could really go for some fresh bacon, so far so good.

Last night I perused a website I use often (well always) called Eat, Live, Run, and decided on Portabello burgers with goat cheese pesto spread on homemade buns, and kale and basil potatoes.

Side note: It is February, and unfortunately most of what I bought (although organic) was not local :( Darn Montana!

While the Hamburger bun recipe, and goat cheese spread, and burgers I must attribute to the chef at Eat, Live, Run, I came up with the idea for our yukon golds on my own. I'll post the recipe for those bad boys here, but for the burgers, you MUST click here and try them, they are soooo right :)


In reviewing these, it is a long day recipe, so perhaps best on a weekend?

Kale and Basil Jo Jo Potatoes

Time: 45 minutes
Serves: About 4 people
3-4 tablespoons good olive oil
1 cup fresh basil leaves
1 cup fresh kale leaves
2 tablespoons fresh grated cheese
2 teaspoons garlic salt
1/2 teaspoon black pepper
5-6 yukon gold potatoes

Heat your oven to 375 degrees. Combine all ingredients but the potatoes into a food processor and pulse until fully grated, ground and mashed together into a paste. Cut the potatoes into large, jo jo style slices.Take the paste and rub it all over all the potatoes and then give a small extra drizzle of olive oil for good measure. Spread the potatoes evenly in a large Pyrex pan (you'll want raised edges at least) and bake for 40 minutes before checking the doneness by pulling one out and trying not to burn your mouth ;)

Home Fried Tofu and Citrus Asian Salad

We found an acceptable home substitute for our FAVORITE tofu dish in Montana!  

Yesterday I heard our 5 year old yearning for the greens of spring, and today I decided I'd find a way to fill the need. I had thought of making an Asian salad, and definitely wanted to make up some yummy tofu, and today, tested two ways and found success. I found both these recipes on my newfound love, Pinterest! (I wish I could put the button on my blog, but cannot figure that out :(

They took some time, but were fiercely delicious and helped fight the greens and bacon craving we had been having!


We made the salad dressing WITHOUT the red pepper flakes and WITH a dash of peanut sauce. I also choose to use a spring mix from our local organic grocer instead of cabbage.


After dishing everything up, each of my kiddos ravenously attacked them. 
The 2 year old was sure the tofu was cheese, peeled the panko off and ate it as was. 
The 7 year old made his own pile of tofu to ensure he got enough. 
Even the picky 5 year old was licking the dressing from his plate, remarking at the yummy colors in his spring mix salad, and asking for more "leaves!"
 

Friday, February 15, 2013

Meatless Days 2 & 3, One Planned, One Not

Mommy Had Wine, The Kids Got Popcorn, and other things...

Friday needed something special this week, and it was neither cheap nor organic, but definitely worth it!
Yesterday, day two meant  we had some very simple fare, and gulped it down after wrestling practice for the boys. An easy, quick, cheap and much loved delivery system for protein in our family is black beans, and for iron, of course is our good friend kale. I made black bean and kale quesadillas, baked in the oven they end up crisp, melty, and not stuck to a pan. I made them before practice and usually we snarf food down beforehand, but this time chose to wait until we were done.

Black Bean and Kale Quesadillas 

Ingredients:
4 tablespoons of cream cheese
4 tortillas
1 can black beans, drained of liquid
2 cups torn kale leaves, raw
2 cups shredded cheddar cheese
Salsa 

Lay your tortillas out on a cookie sheet. Spread about 1 tablespoon of cream cheese around on each one, all over one side of the tortilla. After this, put down a small sprinkle of cheddar cheese on one half the cream cheesed side of the tortilla and then cover the cheese with 1/4 of the ripped kale, several spoonfuls of beans and then for cheddar. Fold the tortilla in half. Do this for the remaining three and bake at 350 degrees until the cheese has melted, keeping a close eye on them so they don't burn, usually abut 8-10 minutes.

 And then there was wine....

Day three, today, I went out with my coworkers after a looooooong week and even longer review from the state, we treated ourselves to Sommelier's, a very nice and very relaxing wine bar complete with artisan cheese boards and hot bread. This was my dinner. Mommy needed something special. The kids, well, the kids got popcorn, leftover biscuits with peanut butter, fruit snacks, and a they requested, bowls of cereal with milk. There is NOTHING wrong with a bit of a smorgasbord every now and then for the little ones, and they really do love it, especially when it comes with a movie night in the living room.


Wednesday, February 13, 2013

A Lenten Experiment and Leek and Potato Soup

Dear meat, its been a decent run, but I'm afraid we're going to have to let you go...

Let's take a stab at this with forks, not knives


Today is Ash Wednesday, and as a family we've decided to let meat go for Lent, and depending on how that goes, maybe longer. We've never been big on meat, and a few months ago our bulk bought beef and pork ran out, we didn't go fishing this summer and my parents were very unlucky hunters. Our freezer has been very empty of all meat (with the exception of a very UNedible William placenta, being saved for the next planted tree. 

I'm going to try and track, through posting, what we do eat as a vegetarian (not vegan though) family. With help from friends and a few cookbooks from the library, and Pinterest of course, I think we can try this whole thing out. 

However, as a forewarning, the last time we tried something over Lent, it was eating organically and locally, and it stuck.

Tonight, night one, was Leek and Potato Soup, ala Julia Child. I spent the day fasting so it was very delicious by my account, and my kids ate it all, and they haven't finished a meal in days (thanks to a nasty tummy virus.)

Leek and Potato Soup

Ingredients:
2 russet potatoes, washed and cut into quarters
2 leeks
1 cup whole milk
2 heaping tablespoons sour cream
3 tablespoons butter
1/2 tablespoon salt
1 teaspoon pepper

In a pot of water, boil the potatoes and leeks. When totally cooked through, (20 minutes or so) drain the liquid into a bowl and reserve it. Add your milk, butter and sour cream to the pot, and then add back in 1 cup of liquid. Use an immersion blender or food processor to blend until smooth, adding the salt and pepper to taste. It should be thinner than mashed potatoes, but thicker than broth. Yum.

Monday, January 21, 2013

A Fast Food Hater Gets Busy...

How We Feed Little Boys on Busy Nights, 

Without a Drive Through

No no no, ick ick ick,


I didn't think we'd be this busy until they were in middle school, but a few weeks ago we caved to the pleas of our seven year old, who wanted desperately to try out wrestling (along with its three nights a week practice requirement.) As little brothers do, Our five year old fell in love with the rough and tumble and soon joined too. Our two year old would, if they had a wrestling class for paperweights.

The rough-and-tumble go and get-um has been perfect for their energy level in the winter, but the schedule has taken some getting used to. Some nights we have faith formation classes at our local church right before wrestling, some nights we have cub scouts right after. It all translates to a slap-dash dinner time that, for my sanity and their metabolisms cannot be put off until bedtime.

This is why lately we've been eating out of bags, but not fast food sacks, Ziploc bags. 

Fast food is essentially disgusting to all of us. My kids do not like it, and it gives my husband and I heartburn and a healthy dose of regret. So, when necessary, we cop a squat outside the elementary gym, sit together in a circle, and pass around bags of different goodies so everyone can have something before practice, and we plan a good snack for at home afterword.Sometimes we just eat early and quick at home when time allows.

Fast and Nourishing Dinners that can be eaten our of Ziplocs:

Focaccia Bread:

Focaccia is a staple in our home, its quick, its filling, it travels and you can add anything to it. For one practice night this week I added freshly grated Parmesan, baby spinach, and garlic, baked it, cut it in squares and tossed it in a bag in less than an hour. Accompanied by slices of apples and salami, it was quick, delish, and NOT McDonalds!
Focaccia Recipe:
1 cup whole wheat flour
1 cup all purpose flour
1 packet active dry yeast
1 teaspoon garlic salt
1 tablespoon dried herb of your choice (we like basil and thyme)
1 cup warm (not hot) water
1 tablespoon chopped fresh garlic
1-2 cups chopped fresh spinach
2-3 tablespoons fresh grated paremsan

Add all these things to a stand mixed with a dough hook, mix on low until a ball forms, not too stiff but not too sticky. Coat the ball in olive oil, put in a bowl and cover with a towel. Let it rise for 30 minutes then bake it on a cookie sheet for 10 minutes at 450 degrees. 

Tiny Tea Sandwiches:

Make your family's favorite sandwich, but then cut it into quarters for easy eating. Try a new kind of bread to keep it interesting. We love using sourdough but also enjoy honey whole wheat and multi grain. Our favorite kinds of combinations are peanut butter and honey, ham, spinach and cream cheese, cucumber and cream cheese, and butter and honey/

Hand Cakes:

Essentially, buying premade pancakes, or even pancake mix, is sort of ridiculous. I use an old Betty crocker recipe and an electric griddle that takes around 20 minutes to make a whole batch, and your can freeze and fridge them for future use. To make pancake eating quicker and more nutritious than fluffy IHOP style cakes, I use mostly whole wheat flour and add a good portion of toasted nuts and shredded fruit. Last week we had a shredded green apple and toasted walnut "hand cake" and the kids feasted on instead of using forks and butter and syrup and this made it fun (eating with hands!) Also, this made it quick.

Lots of Raw Fruits and Veggies!

Who says fast food has to be a burger? An apple takes 20 seconds to slice up. An orange a minute.  


Sunday, January 13, 2013

Tea Time at Ophus Abbey

Peanut Butter Rum Cocoa Cookies on Recycling Day

Slightly obsessed with Downton Abbey, I felt like this Sunday needed a tea time, and a treat to boot!
Its been 0 degrees or less outside for days, and somehow it happened that we HAD to go out today. When I say we I mean myself and three boys ages 7 and under. It was plastics recycling weekend in Helena, MT, and this opportunity only comes once every two months, and we skipped last chance. I found myself bundling boys after our early lunch and throwing them into our van, brimming over with old milk jugs, juice containers, and berry cases.

By the time we returned home, everyone was hungry again, and I couldn't feel my fingers. Definitely tea time, and definitely time for treats. I brewed up a pot of huckleberry tea and poured a cup for everyone, adding cream and a smack of honey to the cups for the little boys. I then commenced something yummy for tea time, and randomly threw ingredients in our mixer until these cookies, both childish and grown up, eventuated. 

Peanut Butter Rum Cocoa Cookies

INGREDIENTS:

1/2 cup butter
1/2 cup peanut butter
1/2 cup brown sugar
1/2 cup granulated sugar
1/2 cup fancy hot cocoa powder (I used Kitchen TLC hot sipping chocolate)
1 pastured egg
1/2 teaspoon vanilla extract
1/2 teaspoon rum extract
1/2 teaspoon baking soda
1/2 teaspoon baking powder
1 1/4 cup all purpose flour

Add softened butter and peanut butter to a mixing bowl with the beater attachment on and cream on medium speed until creamily combined.  (Yes, we love the creamy ;)

Add the two sugars and cream together again. Then add the extracts, egg, baking powder and baking soda, and cocoa and cream together again.(Yes, MORE creamy ;)

Add your flour, mix until combined and then use a disher to put your cookies on a greased cookie sheet (about 9 to a sheet to let them have room) and bake for 7-8 minutes in a 375 degree over. My recipe made 30. An hour ago there were 30. There are 20 now. Oops.


Saturday, January 5, 2013

Creative Use of Band Fruit 101 ~ Pear and Parsnip Sauce

Not Only Organic, But Also Broke

Yummy, free and very ripe band fruit

As my blog name denotes, I try very hard to keep it organic and local, but there are times where we just keep it....broke. After a fun, active, busy and at times pricey Christmas season, there wasn't a whole lot left for groceries, so we planned to dip into our stored veggies, fruits, and grains (which actually leads to alot of fun and creative meals!)

One of our last stops on our Christmas visiting was to my parent's home, where my youngest brother still resides, and performs in high school band. You know what this means? BAND FRUIT! One of the dreaded/coveted fundraisers for band is selling boxes of fruit, and then the parents who are suckered into it end up eating them hand over fist to try and get the task accomplished before they go bad.

My parents had around 20 pears, all super ripe, all super free, and in need of a home. We gladly obliged. My children, husband, and myself covet ripe fruit. During Flathead peach season I will hide in a corner with a roll of paper towels and a giant, overripe peach to avoid my children stealing a bite. With our CSA in its winter season, we haven't had overripe biting fruit in months, but we still have an abundance of store crops, one of which is parsnips. 

Parsnips are in the carrots family, but for my family they are tough to eat raw. One of the reasons is that they are, well, TOUGH. We usually shred them very thinly into slaw, saute them in butter with carrots, and dice them into stews. The other night though, we thought we'd try something I remembered from Alton Brown. On Good Eats a few years back they faked a child that wouldn't eat veggies and Alton won him over with his version of "Pearsnip sauce." His recipe involved maple syrup, zesting an orange and a few other turns and twists I did not care for (and we did not have the items to boot.) We went simple, and it turned out fabulous. 

It does involve a bit of time, I'm afraid. Its a good dish if you know you're babysitting something on the oven. I made this on risotto night and you don't have to watch this sauce, just be patient and let it happen.

Pear and Parsnip Sauce

INGREDIENTS:

2 parsnips, peeled
4 overly ripe pears
1 cup white grape juice
1 tsp cinnamon (the fresher the better)

Peel your parsnips with a vegetable peeler so none of the brown exterior remains. Cut them into 1 inch rounds and place them in a pot with the juice. Put your lid on the pot and bring it to simmer rapidly but not boil like crazy (about medium temp worked for us, you don't want your liquid to boil away.)

Allow them to simmer in the covered pot and steam until they are VERY soft, almost like a boiled potato. For me this took about 35 minutes, but it might take longer. 

Once you've stabbed the parsnips with a fork and determined them to be boiled potato consistency, cut your pears into cubes, maybe 2 inches in size, and toss them in the pot as well. 

Allow everything to steam together, occasionally shaking your pan to redistribute everything, for about 10 more minutes. Add a little juice if it all boils away. 

After that 10 minutes, remove the pan from heat drain off almost all of the liquid, leaving about 1/4 of a cup in the pan. Use an immersion blender or a food processor to blend the remains with the cinnamon and serve warm, but not hot.


Tuesday, January 1, 2013

Ham Salad from a Mayonaisse Hater

Healthy and Nourishing Ham Salad

I enjoy a sweet and caramelized ham like any other Montanan, but A few weeks ago, I thought something fowl would be more enticing. 

I spent a week trying to convince my husband before Christmas that a smoked turkey from Tizer Meats in Helena would be a yummy treat and a nice change of pace for our Christmas luncheon before shoving off to visit family. 

He did not enjoy this idea that one would "change pace" for a holiday celebratory meat so central to his childhood memories we even heard the story of why hogs were special from my father in law this Christmas. 

He grew up on a farm outside Big Sandy, Montana and ate a lot of chicken. The hogs they raised were for sale for the neighbors, not for eating by the family. Every now and then though they would butcher a hog for the family, and pork nights were special nights. Come to think of it, ham was always a special for for my farm based family when we visited as well, so it comes to show that this meat will never be replaced. Sorry smoked turkey, maybe another day.

With leftovers we enjoy a quick and delicious ham salad on sourdough bread, absolutely scrumptious and a very easy way to make leftover ham disappear. As a child I hated it though, and I'll tell you why.....Miracle Whip. I grew up disliking it so much that I would scrape it off any pre-made sandwich I would receive. As an adult I discovered, however, that REAL mayonnaise IS NOT Miracle Whip. 

Miracle Whip is sweeter and spicier and introduced during the Great Depression, it was not as expensive as real mayo, so many sprang for it. Funnily enough, I disliked it and now love real, organic mayonaisse. I am convinced organic eggs change the taste to subtlety delicious too. Here is how we make ham salad, and tonight we're eating the last of it on hot garlic foccacia bread.

Organic Ham Salad

2 cups leftover ham, diced and then grated in a food processor
1/2 cup organic mayonnaise
2 heaping tbl organic dijon mustard (the kind out of the squeeze bottle won't be good enough!)
1 large ribs of celery, minced
1/3 of a red onion, diced  
2 heaping tablespoons sweet pickle relish
1/2 teaspoon pepper

Combine items in bowl. Mix, taste, lick spoon and then eat a spoonful just for yourself, hiding it so noone comes after your creation. Its pretty yummilicious.


Saturday, December 8, 2012

Shallots and Cream Lead to a Deeply Satisfying Night

White Outs, Church Night, and Another Use for Taters

Does anyone else think that snow means ham and cheese?
This morning I trudged through a Montana white out (please Lord let this not be a field and still the road style) to bring my 7 year old to a birthday party. After white knuckling through the white out home, I couldn't stop thinking about melted cheese. Oh, and ham, sweet, sweet ham. 

Tonight was one of the those evenings where I found myself proclaiming very loudly to my very comfortable husband that we would be going to church. After a few weeks off due to 1000 different reasons, we were overdue. At 4:00 I realized I needed to get dinner planned out or when we burst into the house at 6:00 after services, our crazy bunch would be in tears and their mother in shambles trying to feed them quickly. I had time, but not much of it.

I bought a smoked ham (small, about 2 pounds) the day before and quickly glazed it in a mixture of equal parts Dijon mustard, maple syrup,and brown sugar with a dash of pepper thrown in for good measure. I put it in a container, threw a lid on it, and set it aside. 

Then, it was tater time. My parents sent us home with three sacks of potatoes last visit and we've made it through a 2 already. We've french fried, baked, and mashed plenty, but tonight I was feeling brave, so attempted, and succeeded in scalloped potatoes. I did not have to make the elaborate cheese sauce, I sliced, diced and threw together something quaint and delicious.

I had to gamble on the same baking time and temperature my ham needed as they would be in the oven while we were away at mass, and somehow the fates smiled upon us. Here is how I made them, and baked them at the same time as the ham and everything was done when we walked in the door.

SIMPLE SCALLOPED SPUDS WITH SHALLOTS AND CREAM

Ingredients:
1 tbl butter
5 yukon gold potatoes
3 tbl diced shallots
3/4 pint of cream
1 1/2 cups sharp cheddar cheese
1 1/2 tsp salt 
1 1/2 tsp pepper

Preheat your oven to 350 degrees. Slice your potatoes into thin slices, about 1 cm each. Mince your shallots and set aside. 

In an 8X8 baking dish melt 1 tablespoon of butter and swirl it around until the bottom is coated. Place a layer of potatoes, trying only to overlap when necessary. Sprinkle the potatoes in the dish with 1/2 tsp of salt and pepper, 1 tbl of shallots and about 3 tablespoons of cream. Evenly sprinkle about 1/2 cup cheddar cheese. 

This is your first layer. Simple, but awesome. Now layer more potatoes on top of the newly sprinkled cheddar cheese. Lay on your next 1/2 tsp salt and pepper, 1 tbl shallots and 3-4 tbl cream, and  finish with 1/2 cheddar. Finish out the rest of your ingredients. Cover the dish with foil and bake for 1 hour 15 minutes.


Thursday, December 6, 2012

On a Snowy Night, there is Mediterranean Turkey Meatloaf

There is life after Thanksgiving...

The meal was sweet, savory and delicious, but after Thanksgiving, is there still room for turkey in your life?
Many moons ago (well, maybe 6 1/2 years to be fair) I adopted Weight Watchers as a way to manage my food intake. After the post college and early marriage years of eating to excess, and whatever and whenever I wanted, I needed a reality check as to what was an appropriate food choice and portion size.

I used to be able to consume-in one sitting-an ENTIRE Papa Murphy's take and bake cheese bread (with extra cheese.) That's 1749 calories, 54 grams of fat. Nutritional Info

Thank you Weight Watchers for reminding me I really should only eat two slices, and if I drink some water and have a conversation, I would then be full. With weight watchers, I began to learn the limits of my nutrition, and looked into new foods. Its then that I fell in love with ground turkey, the holy grail of Weight Watchers protein. (Besides fish, that is.) 

Ground turkey helps keep post meal insulin low and is lower fat than red meat (although I have nothing against red meat in any way.)

I have a ton of ground turkey recipes, and tonight I employed a favorite to share with my family, as the promise of snow in Montana tonight created in me another turkey craving.

Mediterranean Turkey Meatloaf

Ingredients:

1 pound ground turkey
1 1/2 cups stuffing, wetted with 1/3 cup water
2 eggs
1/2 cup feta cheese 
1/2 cup Parmesan cheese, plus 1/4 for sprinkling on top
1 tsp Italian seasoning
1/4 cup snipped sun dried tomatoes

A NOTE on sun dried tomatoes. I don't dry mine in the sun. I do, however, take my ripe Romas in the summer and run them through the dehydrator, then store them in a freezer bag in the freezer. They are sweeter and have a lovely concentrated flavor.

Set you over to 375 degrees. In a small bowl, put your stuffing in and wet it with about 1/3 cup of water. Use your hand to mix it about until the water is absorbed. 

In a large bowl, put in your ground turkey, now wet stuffing, and all other ingredients. Make sure your Parmesan is not green container in the fridge fake Parmesan. Spring for some real stuff.

Be a He-Woman and use your hands to mix and mash it all about until evenly distributed. Get out a loaf pan, make your mix into a loaf shape, and plop it in the pan. Sprinkle the remaining 1/4 cup Parmesan cheese on top and bake at 375 degrees for 40 minutes before you use a meat thermometer to check the temp. It'll be ready to come out at 165 degrees.

Tuesday, December 4, 2012

How many food rules does it take to make a crazy lady?

Knock Knock

Who's there?

5 pounds.

5 pounds who? Wait.....what? Go away!

I don't own one, but I know where they live, and they always find me!

I USED TO BE 100 POUNDS heavier than I am right now. A size 20. After my oldest was born around 7 years ago I was 100 pounds heavier, and losing the weight was a long journey and an even longer education in what I am capable of. 

I have a couple, well, maybe more than a couple, food and activity and lifestyles rules I try to follow, although as of late, I have failed (hence the 5 pounds coming knocking.)

Some of these are based off of Michael Pollan's Food Rules, some of them are from other places, but in the interest of disclosure, here they are:

1) Always eat breakfast. If not it'll ruin my metabolism.
2) Always pack my own lunch to work, that way I know what's in it, don't spend money on an unhealthy one, and always eat.
3) Enjoy a family dinner. Sitting at a table is better for so many reasons.
4) When I'm hungry in between meals, I drink water or tea first, then decide if I am really hungry. First impulse to eat usually means I'm dehydrated.
5) We rarely eat out, maybe 2 times a month. Meals are made and eaten at home.
6) No fast food, that means drive throughs-ie McDonalds-We haven't eaten fast food french fries or sandwiches in three years.
7) I don't eat after 6:00 in the evening-my metabolism slows down then and going to bed while still digesting creates for me indigestion.
8) Soda is rare. Almost a never. Water is so much better.
9) We eat alot of probiotics, yogurt, kefir, etc-this helps aid good digestion.
10) I try to be active after dinner, cleaning, climbing stairs, spending time playing with kids, and when its light out walking the dog. 
11) Hot yoga! I do barkan yoga at HOT YOGA HELENA and adore it. This I have slacked on lately as the class I typically go to is at 6 AM and I have needed my sleep lately! 

Well, since I haven't posted in awhile, these are some of my bizarre food thoughts....enjoy ;)


Friday, November 23, 2012

A Special Casserole of Oysters on Thanksgiving

Fish Among Fowl, The Oyster Casserole

I buy them in the jars, and so far have never had them fresh...someday!

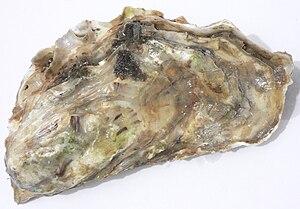
One of the finer traditions on Thanksgiving for my family is not the turkey or the potatoes, although they are amazing, it is the casserole of oysters, passed down from my grandparents to us. My side of the family are not Montana stock, but from the East coast. From them we have the tradition of an oyster casserole that slides along side of a green bean casserole on special holidays.

Here is my grand father's recipe:

Ingredients:

1 pint of oysters, in their juice 
1/2 cup salted butter + 1 tbl butter for greasing dish
3/4 cup whole milk
1/4 cup oyster liquor (the liquid from the pint should be enough)
1 teaspoon Worcester sauce
1/2 teaspoon salt
1 cup diced celery, with leaves
2 tablespoon fresh parsley leaves 
Pepper to taste
2 cups crushed saltine crackers

Grease a medium casserole dish with butter.

Drain your oysters but reserve the liquid into another container. Add the milk and Worcester sauce to the oyster liquor.
 
Melt the rest of your butter and pour over crushed crackers and add the salt, mixing until evenly distributed. 

Chop your celery and parsley and set aside.

Spread 1/3 of your crackers on the bottom of the casserole dish and sprinkle with black pepper. Cover with 1/2 the oysters, 1/2 the celery, and 1/2 the parsley leaves. Make another layer of 1/3 of your crackers, the other half the oysters, 1/2 the celery and 1/2 the parsley leaves and sprinkle with black pepper. Finish by evenly pouring the rest of the crackers. 

Pour your liquid over the top of the casserole, drizzling evenly over each area of the casserole. 

Bake at 350 degrees for about 40 minutes. To check for doneness tip the dish and see if liquid seeps to the top. If there is a bit seeping, let it go for a few more minutes. 

Yummmmmm.


Saturday, November 17, 2012

Forget Costco! Birthday Cupcakes from the HOME Kitchen

Honestly Easy Birthday Cupcakes: 

Pistachio Pudding Cakes and Strawberry Cupcakes

Sweet strawberry cupcakes that put Costco to shame-and yes, this picture is of the cupcakes I baked :)
I PASSIONATELY DISLIKE COSTCO CUPCAKES. There are those that enjoy the refined sugar high and following crash, but I do not, and neither do the lower intestines of my children. 

Today is an early birthday party for our almost 5 year old's, and while I conceded the location (I would rather be at a museum, but alas we are headed to a bounce house collection) I would not concede the treats. 

Thanks to one of my favorite websites, Eat, Live, Run, I found two sweet recipes for the crown of adult friends, family, and preschoolers that we'll be seeing very soon.

These cupcakes were very inexpensive too, if you keep standard baking supplies in your pantry its pretty simple.

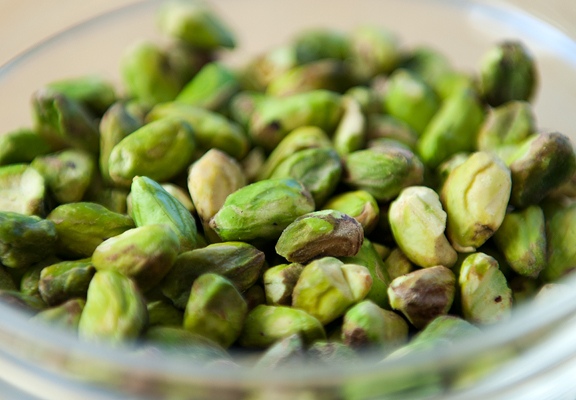
Mmmmmmm, PISTACHIOS!
The first recipe is for our first grader, and the adults that will be in tow. Its a little more grownup, but for those that like pistachios, its delectable. This recipe is not mine, but now that I have the basics, I'll be expanding into several different versions!


The cupcakes in this recipe (follow the link) are only three ingredients!

For strawberry lovers, only!


This second recipe is our preschoolers request. He ADORES strawberries and wanted some cupcakes desperately that reflected his love. So yes, I made my 5 year old BOY pink cupcakes, but its exactly what he wanted, and they are fabulous, so who can complain!? 

Make sure to use organic strawberries. Although they are not in season in Montana (its November) its a pretty good assumption that non organic berries are covered in pesticides, even after being rinsed, and I think organic just tastes better!

Friday, October 26, 2012

Old Mother Hubbard had some Nourishing Wisdom

Hubbard Squash Soup with Sage and Cream

Blue green, bumpy and sweet to boot!
Very good friends of ours introduced us to the Hubbard squash. Funny looking as it was they swore up and down they were fabulous and that prepared in a soup there was nothing that could beat it.

Tonight, a Friday night, I had planned to make my soup, but around 2:11 PM I began to doubt my will power. I was tired after a week of getting up for yoga at 6AM (ok, well maybe twice), chasing three little boys and working 40 plus hours. 

With some proper motivation from friends to avoid calling out for dinner (a comment akin to "fight the man" was inserted somewhere in there) I did indeed prepare the soup, based on a recipe from a friend but modified for what I did and did not have in my cabinet.

Here's how I did it.

INGREDIENTS: * means its local

1 medium sized Hubbard squash *
2 tablespoons olive oil *
1 shallot, minced *
4 garlic cloves, minced *
1 quart homemade chicken stock *
1 teaspoon salt
1 teaspoon black pepper
1 teaspoon dried sage
1/8 teaspoon cinnamon
1/8 teaspoon nutmeg
1/2 cup heavy cream
1/2 sour cream

Set your oven to 300 degrees. Cut your Hubbard squash in half and cut out the seeds. Rub half a tablespoon of olive oil on each half, cover with foil and roast in your oven for 45 minutes as the flesh softens and cooks.

When your squash has about 20 minutes left, heat your remaining tablespoon of olive oil in a stock pot and saute your minced shallots and garlic for 5 minutes or so until they are softened and browning. Add your stock and spices and allow to simmer until your squash is ready to come out of the oven. 

Remove your squash and be careful not to burn your hands. Spoon the soft flesh out of both halves and into your stock pot and continue to simmer for another 15 minutes. Turn off your stove. Add your cream and sour cream and use an immersion blender or food processor to blend your soup into a creamy texture.

DELICIOUS!!!


Tuesday, October 16, 2012

James Taylor, Mint Green, and Butternut Squash Mac and Cheese

Thriving in Squash Season

Oh the goodies, so many kinds!

This week was the official last week of my fabulous CSA, Western Montana Growers Co-op. We are deeply saddened harvest is over and for my last request, I ordered several squashes to store in my pantry. We received spaghetti, Hubbard, red kuri, pumpkin and many butternut squash because it is my ALL TIME FAVORITE!

This week we'll be making, and time permitting blogging, two different butternut dishes, and tonight with the rain and the wind, there were three things I needed to get through the evening with three little boys, James Taylor, mint green tea, and butternut squash mac and cheese.

Butternut Squash Mac and Cheese

INGREDIENTS: * means its local

2 tbl butter *
2 tbl minced shallot *
1/2 large butternut squash, cubed into 1 inch pieces *
1/2 cup white wine (if you don't keep wine, just substitute for more chicken stock)
3/4 cup chicken stock * (homemade is best but canned will do)
1 cup whole milk *
1 cup (plus 1/2 cup for later) shredded sharp cheddar cheese *
1 cup  (plus another 1/2 cup for later) mozzarella cheese *
1/4 cup grated Parmesan
3/4 cup seasoned breadcrumbs
2 cups dry pasta, your choice, cooked until tender 
1/2 tsp nutmeg
1 tsp salt
1 tsp black pepper

Put a large pot of water on to boil and begin cooking your pasta according to package direction until tender. 

In a large sauce pan melt your butter and saute your shallots for about 5 minutes until translucent and fabulous smelling. Add your cubed squash and saute in the butter and shallots for another 5 minutes. 

At this time, add your wine and broth and simmer, covered, until your squash is very tender, to the point of mashing with a fork, about 15 minutes. When tender, add your milk and then blend until smooth with an immersion blender or in a food processor.

Turn your oven on to 325 degrees.

Return sauce to low heat and slowly add and stir your first cup of cheddar and mozzarella until they melt into the sauce. Add your salt, pepper and nutmeg and maintain on a low heat, stirring occasionally.

When your pasta is finished cooking, drain and add the pasta into a medium sized, oven safe casserole dish. Pour your fabulous sauce into the pasta and mix it about. Sprinkle breadcrumbs, Parmesan cheese and the remaining shredded cheese to the top and bake at 325 until the sides are bubbling and the crumbs appear a bit brown, about 20 minutes. Keep an eye on it as if it has stopped bubbling, it is starting to go from gooey to pastey.

Enjoy!


Tuesday, October 9, 2012

Delicious and Nourishing (Not Lunch Lady) Salisbury Steak

I had this salt and onion carving, and made it come true!

   
Why do you taste so good with salt and meat?!

I usually hate the idea of school lunch and my first grader brings a home packed cold lunch almost every day of the week. Occasionally, he will indulge in corn dog day, his favorite of all hot lunch days. Confession, my favorite was Salisbury steak and mashed potato day, and I was craving it in a crazy way.

I therefor declared I would find a way to make it in a not gross way, and tonight, I mastered that, and then some!

INGREDIENTS!

1 pound 85/15 ground beef
1 dinner roll, crumbled onto a cookie sheet and turned into bread crumbs
1/2 cup minced onions
1/2 teaspoon salt
1/2 teaspoon black pepper
1 pastured egg
1 tbl Worcestershire sauce 

Flour for dusting
2 tbl butter

parchment paper
1 large cast iron skillet

Turn your oven on to 350 degrees. Take a dinner roll or two slices of artisan bread and crumble it onto a cookie sheet. Bake in your oven for around 5 minutes, not burning the crumbs but drying them out.

In a large mixing bowl, add your beef, egg, onions, salt, pepper and Worcestershire. Pull your bread crumbs from the oven and allow them to cool. Add the crumbs to the bowl and with your hands mix thoroughly. 

Put a sheet of parchment paper on a plate. Separate your beef mix into eight equal sized balls. On the first layer of parchment, place four balls and flatten them to less than 1/2 inch thick, closer to 1/4 inch. Dust with flour, then lay down a piece of parchment paper on top. Take the next four balls, flatten them into 1/4 to 1/2 inch patties and then dust with flour.

Allow the patties to sit and mellow at room temperature for about 30 minutes.

Heat your cast iron skillet to medium high heat and melt your butter. Add four patties, flour side down, and sprinkle the tops with a bit more flour.

Cook until the edges start to look more brown than pink, about 5 minutes, then flip. Cook for another five. Remove and allow to rest on a plate while you cook the next batch.

We ate ours alongside mashed potatoes and butter poached carrots. Soooooo yummy!


Sunday, October 7, 2012

Ham and Pea Soup and Quick Yeast Rolls

My crock pot is so special to me, I honestly should name it...

Seriously, I adore my little crock pot and have used it so much lately, I free it will soon break. 

Its perfect for nights you know you'll be rushed, days you need to smell something good when you walk in the door, and avoiding the "oh crap soccer's over at 6:30 and I can't make anything for my hungry kids in the 30 minute window we have before bath time" phenomena.

Last night was Saturday night, when as a family we make the trek to mass. Our church is honestly only six blocks from our house but with a 6, 4, and 2 year old its a trek nonetheless. An an exercise in patience for my husband and I who try to keep our trio of not so tidy gentlemen managed in a neat enough way so as not to get "the eye" from the old ladies surrounding us.

By the time we get home, everyone is hungry, and goofy. I cannot cook and wrangle after an hour of patience exercising. This is when I whip out the crock pot. Last night we had ham and pea soup made with homemade chicken stock and leftovers of our Easter ham (it was frozen, I promise no one ate mold.)

Here is how I managed to serve an all day dinner as soon as we came home:

Ham and Pea Soup in the Crock Pot

Mmmmmmmm. Peas.

A few disclaimers here. Part of getting the savory flavor of a well loved meal is prepping ahead. There were a few parts that needed done ahead of time. 

One is if you use dried split peas, as I did, you HAVE TO SOAK THEM in twice as much water as peas for 24 hours ahead of time or they will never cook right. 

Two is for the best tasting soup, using homemade chicken stock is a must, but you can used canned if you don't make stock. I make stock out of every chicken carcass we roast, one or two times a month, and then freeze it for later. Alice Waters chicken stock recipe is my favorite.

Ingredients:

6 cups chicken stock (home made or store bought)
2 cups dried split peas (make sure to soak them for 24 hours at least in 4 cups water, then drain off the water before adding)
2 cups cooked ham (I froze extras from Easter and then reused it last night, ham freezes amazingly well)
1 cup chopped celery
1 small yellow or white onion, chopped
3-4 chopped carrots
1 cup chopped green cabbage
1 bay leaf
Salt and Pepper to your taste

Here's how it goes:

STEP 1: Walk into the kitchen in your bathrobe, make coffee, drink coffee, check Facebook on your ipod touch. OK, you don't have to do this part, this is how I started off though.

REAL STEP 1: Get out your crock pot. Ours is not huge, actually pretty small. Chop, then add in your veggies, peas, bay leaf, ham, spice, and last put in your stock.

STEP 2: Set crock pot to  high for the first 4 hours, low for the next 4-6 hours. Give it a good stir when you remember, once or twice out to do it to mix things up a bit. 

To go with, I premade (baked in the afternoon then sealed in a container) some yummilicious rolls. Here is the recipe for those, they were a fabulous addition to our soup meal! Quick Yeast Rolls from All Recipes


Sunday, September 23, 2012

You MUSY Try this: Crock Pot Apple Butter

This Season's Discovery: Crock Pot Apple Butter

It Montana apple season, and they're coming in droves!
I have fond memories from being 7 or 8 years old and going to an apple orchard. It must have been in Nebraska, where we were living at the time, and I remember cider, hay rides, and all around fall fun. Maybe that's why when we had the chance to buy a house with three mature apple trees, we jumped on it.

Apple can seem so blah when all you eat or buy are the red apples from Wal-Mart and they are the same, bland fruit over and over. We are so fortunate in Montana to have great apple weather and tons of varietals of apple. This week in our CSA box we received several bags of beautiful pinkish apples, sweet but crisp. We've eaten plenty raw, but with the extras today I am making the easiest and most delicious and easily storable item, APPLE BUTTER!

My grandmother's made this beautiful concoction, but this year is the first I have ever tried it. It amazingly simple, totally cannable, freezable, and store in the fridgeable, and I have some in my crock pot right now! We eat it on bread, in yogurt, on pancakes, or by the spoonful for a treat. Try it, its easy.

You'll need:

A crock pot (our is medium sized, not large and it works fine)
A sharp knife
A vegetable peeler
1 Cup Sweetener (sugar, honey, Steevia, what have you)
2 Tablespoons Cinnamon
2 Tablespoons Apple Cider Vinegar
Apples (any variety, about a dozen medium sized for us)

Here's How:

Peel your apples and cut them into quarters. Don't use the core. 

Put them all in the crock pot while it is still off. 

Add your sweetener, vinegar, and cinnamon. 

Put the lid on and turn your crock pot on high for the first hour. 

Turn it back to low and allow it to go ALL DAY, eight hours or more. 

For the last hour take the lid off, turn it to high and let it bubble with the lid off. Occasionally give the contents a stir throughout the day but no need to babysit it. 

When finished, it is molten hot. Your can store it in canning jars in the fridge, but allow it to cool overnight before you put the lid on and put it in the fridge. You can also can it, but I have not attempted this yet. 


Tuesday, September 18, 2012

Bulbous Purple Nightshade Tale

Eggplant Parmesan ala Busy Mom

Many varieties, many uses :)
This week in our CSA box, we snagged two purple beauties, and the first thing that came to my mind with eggplants was Parmesan!I was hoping it would be more fall like this week but today was more smokey than anything. I still wanted this cheesy goodness so baked it even thought the weather wasn't perfect for it.

Eggplants, when cooked wrong, are chewy and can turn you off of dinner quickly. I perused the internet and found a few ideas to create the following dish delish! I used my own canned tomato sauce for this recipe, but I'm sure you can use store bought just as well. The home canned sauce was amazing though, and organic and cheap because I made it!

And it wasn't all that hard!

Preheat your oven to 375 degrees.

Ingredients: * means its local

2 medium eggplants *
3 eggs *
1 sleeve saltine crackers
1/2 cup flour *
1 tsp garlic salt
1 tsp dried oregano *
1 tablespoon salt

3 tbl olive oil

2 pints spaghetti sauce *
3 cups shredded cheese (we used Parmesan, cheddar, and Monterrey jack) *

Slice your eggplants into 1/2 inch rounds, put them in a colander and rub with salt, allow them to sit for an hour if you have the time, 30 minutes if you need less.

In a small bowl, whip your eggs with a fork until thoroughly combined. In another medium bowl, crush your crackers and mix them with the flour, garlic salt, and oregano.

Blot your eggplants on paper towels. Heat a pan to medium high heat with your oil in it until the oil shimmers. Batter your eggplant pieces in egg first, then flour mixture, then egg again, then flour mixture again. Saute them in the oil for 6-8 minutes a side, until golden brown but also allowing the middle to soften and the batter to crisp.

Fry your eggplants in batches until done and set them aside.

In a baking dish (I used an 8X8) pour a pint of sauce on the bottom. Then add a layer of fried eggplants and then 1/2 of your cheese mixture. Add another layer of eggplant, another pint of spghetti sauce and the rest of your cheese.

Bake at 375 for 35-40 minutes or so, and when you remove them, let them sit for ten minutes before serving. They were crunchy, cheesy, saucy and awesome!


Monday, September 10, 2012

Like a Nerd on Date Night, Fumbling through Chile Rellenos

Peppers, Peppers, Peppers, Cheese and Spice!

Hellooooo handsome!
This week our delightful CSA sent us bell and poblano peppers, the likes of which were shiny, firm, beautiful and fabulous. I held them in my hands and thought about the delicious possibilities. Peppers contain high amounts of vitamins C and A, and when I have the chance to make a filling dish based on veg and not meat, I will take it! From these thoughts, I started to fumble through chile rellenos, a Mexican version of stuffed peppers, and here's what I ended up with:

Ingredients: * Mean its local

6 peppers (any kind, I used poblano and bell) *
2 tablespoons olive oil
1 cup bread crumbs (panko have a good crunch but any are fine)
1 cup shredded cheese (we used raw milk cheddar, half for the filling, half for the topping) *
3/4 cup fresh cilantro, torn or chopped *
1/2 teaspoon cumin
1/2 teaspoon pepper
2 diced garlic cloves *
1 cup milk *
4 eggs *
1/2 cup flour *
1/2 teaspoon salt
1 teaspoon baking powder
1 slicing tomato *


STEP 1:

You'll need 6 peppers of your choice, I used 3 poblano and 3 bell because I was not sure how spicy the spicy peppers would be in the end (mild heat, by the way.)

Rub the peppers in olive oil and put them on a baking sheet under your oven broiler. Turn it to high and let them roast and blacken their skins for about 4 minutes before turning them with tongs to blacken the next side.

After each side is pretty black and charred, but not smoking or on fire, take them off your baking sheet, put them in a lidded rubbermaid container or ziploc bag, and seal them in for a good ten minutes while they cook down and the skins loosen up.

After ten minutes run some cold water from the tap, rinse off the peppers and peel off the skin. Set your peppers aside.

STEP 2:

Prepare your stuffing! I used 1 cup of bread crumbs, 1/2 cup shredded raw cheddar cheese, tear up about 1/4 cup of cilantro and mix it in with 1/2 teaspoon cumin and 1/2 teaspoon pepper. Add in 2 diced garlic cloves and stir it all together.

STEP 3:

Ready your batter! In a food processor, with a stick blender, or even with just a fork, mix together 1 cup milk, 4 eggs, 1/2 cup flour, 1 teaspoon baking powder and a pinch of salt.

Step 4:

Stuff your peppers! Set aside your choice of cheese in six large chunks, cheddar, Monterrey jack, your choice, for ease I used mozzarella (its what I had!) Oil a baking dish and set your peppers inside of it. Put a generous spoonful of stuffing and piece of cheese inside each pepper (they will fall apart a bit, no one will care!) One they are all stuffed, pour the batter on top of them, slice up a tomato and layer it on top of the batter, tear up about 1/2 cup of cilantro and drop it on top of the tomatoes and sprinkle more cheese, your choice on top of that.

STEP 5: Bake! For 35 minutes at 350 degrees.

We ate our covered in salsa and sour cream and they were awesome!