Friday, October 26, 2012

Old Mother Hubbard had some Nourishing Wisdom

Hubbard Squash Soup with Sage and Cream

Blue green, bumpy and sweet to boot!
Very good friends of ours introduced us to the Hubbard squash. Funny looking as it was they swore up and down they were fabulous and that prepared in a soup there was nothing that could beat it.

Tonight, a Friday night, I had planned to make my soup, but around 2:11 PM I began to doubt my will power. I was tired after a week of getting up for yoga at 6AM (ok, well maybe twice), chasing three little boys and working 40 plus hours. 

With some proper motivation from friends to avoid calling out for dinner (a comment akin to "fight the man" was inserted somewhere in there) I did indeed prepare the soup, based on a recipe from a friend but modified for what I did and did not have in my cabinet.

Here's how I did it.

INGREDIENTS: * means its local

1 medium sized Hubbard squash *
2 tablespoons olive oil *
1 shallot, minced *
4 garlic cloves, minced *
1 quart homemade chicken stock *
1 teaspoon salt
1 teaspoon black pepper
1 teaspoon dried sage
1/8 teaspoon cinnamon
1/8 teaspoon nutmeg
1/2 cup heavy cream
1/2 sour cream

Set your oven to 300 degrees. Cut your Hubbard squash in half and cut out the seeds. Rub half a tablespoon of olive oil on each half, cover with foil and roast in your oven for 45 minutes as the flesh softens and cooks.

When your squash has about 20 minutes left, heat your remaining tablespoon of olive oil in a stock pot and saute your minced shallots and garlic for 5 minutes or so until they are softened and browning. Add your stock and spices and allow to simmer until your squash is ready to come out of the oven. 

Remove your squash and be careful not to burn your hands. Spoon the soft flesh out of both halves and into your stock pot and continue to simmer for another 15 minutes. Turn off your stove. Add your cream and sour cream and use an immersion blender or food processor to blend your soup into a creamy texture.

DELICIOUS!!!


Tuesday, October 16, 2012

James Taylor, Mint Green, and Butternut Squash Mac and Cheese

Thriving in Squash Season

Oh the goodies, so many kinds!

This week was the official last week of my fabulous CSA, Western Montana Growers Co-op. We are deeply saddened harvest is over and for my last request, I ordered several squashes to store in my pantry. We received spaghetti, Hubbard, red kuri, pumpkin and many butternut squash because it is my ALL TIME FAVORITE!

This week we'll be making, and time permitting blogging, two different butternut dishes, and tonight with the rain and the wind, there were three things I needed to get through the evening with three little boys, James Taylor, mint green tea, and butternut squash mac and cheese.

Butternut Squash Mac and Cheese

INGREDIENTS: * means its local

2 tbl butter *
2 tbl minced shallot *
1/2 large butternut squash, cubed into 1 inch pieces *
1/2 cup white wine (if you don't keep wine, just substitute for more chicken stock)
3/4 cup chicken stock * (homemade is best but canned will do)
1 cup whole milk *
1 cup (plus 1/2 cup for later) shredded sharp cheddar cheese *
1 cup  (plus another 1/2 cup for later) mozzarella cheese *
1/4 cup grated Parmesan
3/4 cup seasoned breadcrumbs
2 cups dry pasta, your choice, cooked until tender 
1/2 tsp nutmeg
1 tsp salt
1 tsp black pepper

Put a large pot of water on to boil and begin cooking your pasta according to package direction until tender. 

In a large sauce pan melt your butter and saute your shallots for about 5 minutes until translucent and fabulous smelling. Add your cubed squash and saute in the butter and shallots for another 5 minutes. 

At this time, add your wine and broth and simmer, covered, until your squash is very tender, to the point of mashing with a fork, about 15 minutes. When tender, add your milk and then blend until smooth with an immersion blender or in a food processor.

Turn your oven on to 325 degrees.

Return sauce to low heat and slowly add and stir your first cup of cheddar and mozzarella until they melt into the sauce. Add your salt, pepper and nutmeg and maintain on a low heat, stirring occasionally.

When your pasta is finished cooking, drain and add the pasta into a medium sized, oven safe casserole dish. Pour your fabulous sauce into the pasta and mix it about. Sprinkle breadcrumbs, Parmesan cheese and the remaining shredded cheese to the top and bake at 325 until the sides are bubbling and the crumbs appear a bit brown, about 20 minutes. Keep an eye on it as if it has stopped bubbling, it is starting to go from gooey to pastey.

Enjoy!


Tuesday, October 9, 2012

Delicious and Nourishing (Not Lunch Lady) Salisbury Steak

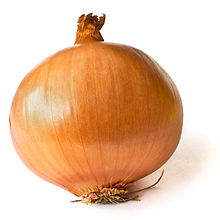
I had this salt and onion carving, and made it come true!

   
Why do you taste so good with salt and meat?!

I usually hate the idea of school lunch and my first grader brings a home packed cold lunch almost every day of the week. Occasionally, he will indulge in corn dog day, his favorite of all hot lunch days. Confession, my favorite was Salisbury steak and mashed potato day, and I was craving it in a crazy way.

I therefor declared I would find a way to make it in a not gross way, and tonight, I mastered that, and then some!

INGREDIENTS!

1 pound 85/15 ground beef
1 dinner roll, crumbled onto a cookie sheet and turned into bread crumbs
1/2 cup minced onions
1/2 teaspoon salt
1/2 teaspoon black pepper
1 pastured egg
1 tbl Worcestershire sauce 

Flour for dusting
2 tbl butter

parchment paper
1 large cast iron skillet

Turn your oven on to 350 degrees. Take a dinner roll or two slices of artisan bread and crumble it onto a cookie sheet. Bake in your oven for around 5 minutes, not burning the crumbs but drying them out.

In a large mixing bowl, add your beef, egg, onions, salt, pepper and Worcestershire. Pull your bread crumbs from the oven and allow them to cool. Add the crumbs to the bowl and with your hands mix thoroughly. 

Put a sheet of parchment paper on a plate. Separate your beef mix into eight equal sized balls. On the first layer of parchment, place four balls and flatten them to less than 1/2 inch thick, closer to 1/4 inch. Dust with flour, then lay down a piece of parchment paper on top. Take the next four balls, flatten them into 1/4 to 1/2 inch patties and then dust with flour.

Allow the patties to sit and mellow at room temperature for about 30 minutes.

Heat your cast iron skillet to medium high heat and melt your butter. Add four patties, flour side down, and sprinkle the tops with a bit more flour.

Cook until the edges start to look more brown than pink, about 5 minutes, then flip. Cook for another five. Remove and allow to rest on a plate while you cook the next batch.

We ate ours alongside mashed potatoes and butter poached carrots. Soooooo yummy!


Sunday, October 7, 2012

Ham and Pea Soup and Quick Yeast Rolls

My crock pot is so special to me, I honestly should name it...

Seriously, I adore my little crock pot and have used it so much lately, I free it will soon break. 

Its perfect for nights you know you'll be rushed, days you need to smell something good when you walk in the door, and avoiding the "oh crap soccer's over at 6:30 and I can't make anything for my hungry kids in the 30 minute window we have before bath time" phenomena.

Last night was Saturday night, when as a family we make the trek to mass. Our church is honestly only six blocks from our house but with a 6, 4, and 2 year old its a trek nonetheless. An an exercise in patience for my husband and I who try to keep our trio of not so tidy gentlemen managed in a neat enough way so as not to get "the eye" from the old ladies surrounding us.

By the time we get home, everyone is hungry, and goofy. I cannot cook and wrangle after an hour of patience exercising. This is when I whip out the crock pot. Last night we had ham and pea soup made with homemade chicken stock and leftovers of our Easter ham (it was frozen, I promise no one ate mold.)

Here is how I managed to serve an all day dinner as soon as we came home:

Ham and Pea Soup in the Crock Pot

Mmmmmmmm. Peas.

A few disclaimers here. Part of getting the savory flavor of a well loved meal is prepping ahead. There were a few parts that needed done ahead of time. 

One is if you use dried split peas, as I did, you HAVE TO SOAK THEM in twice as much water as peas for 24 hours ahead of time or they will never cook right. 

Two is for the best tasting soup, using homemade chicken stock is a must, but you can used canned if you don't make stock. I make stock out of every chicken carcass we roast, one or two times a month, and then freeze it for later. Alice Waters chicken stock recipe is my favorite.

Ingredients:

6 cups chicken stock (home made or store bought)
2 cups dried split peas (make sure to soak them for 24 hours at least in 4 cups water, then drain off the water before adding)
2 cups cooked ham (I froze extras from Easter and then reused it last night, ham freezes amazingly well)
1 cup chopped celery
1 small yellow or white onion, chopped
3-4 chopped carrots
1 cup chopped green cabbage
1 bay leaf
Salt and Pepper to your taste

Here's how it goes:

STEP 1: Walk into the kitchen in your bathrobe, make coffee, drink coffee, check Facebook on your ipod touch. OK, you don't have to do this part, this is how I started off though.

REAL STEP 1: Get out your crock pot. Ours is not huge, actually pretty small. Chop, then add in your veggies, peas, bay leaf, ham, spice, and last put in your stock.

STEP 2: Set crock pot to  high for the first 4 hours, low for the next 4-6 hours. Give it a good stir when you remember, once or twice out to do it to mix things up a bit. 

To go with, I premade (baked in the afternoon then sealed in a container) some yummilicious rolls. Here is the recipe for those, they were a fabulous addition to our soup meal! Quick Yeast Rolls from All Recipes